
13 steps · 4 parts · 1 roles
Running your team: members, roles, and who marks what
Add a member of staff, decide what they can do, and route the marking to them: automatically by share, in bulk from the queue, or one piece at a time.
Everything below is the real product, photographed automatically. The school, its staff and its pupils are invented for this walkthrough — no real family appears on this page.
Adding a member of staff
Steps 1–5Org Admin- penleap.com/dashboard/teamSigned in as Org Admin
1Everyone at the centre, and where each of them stands 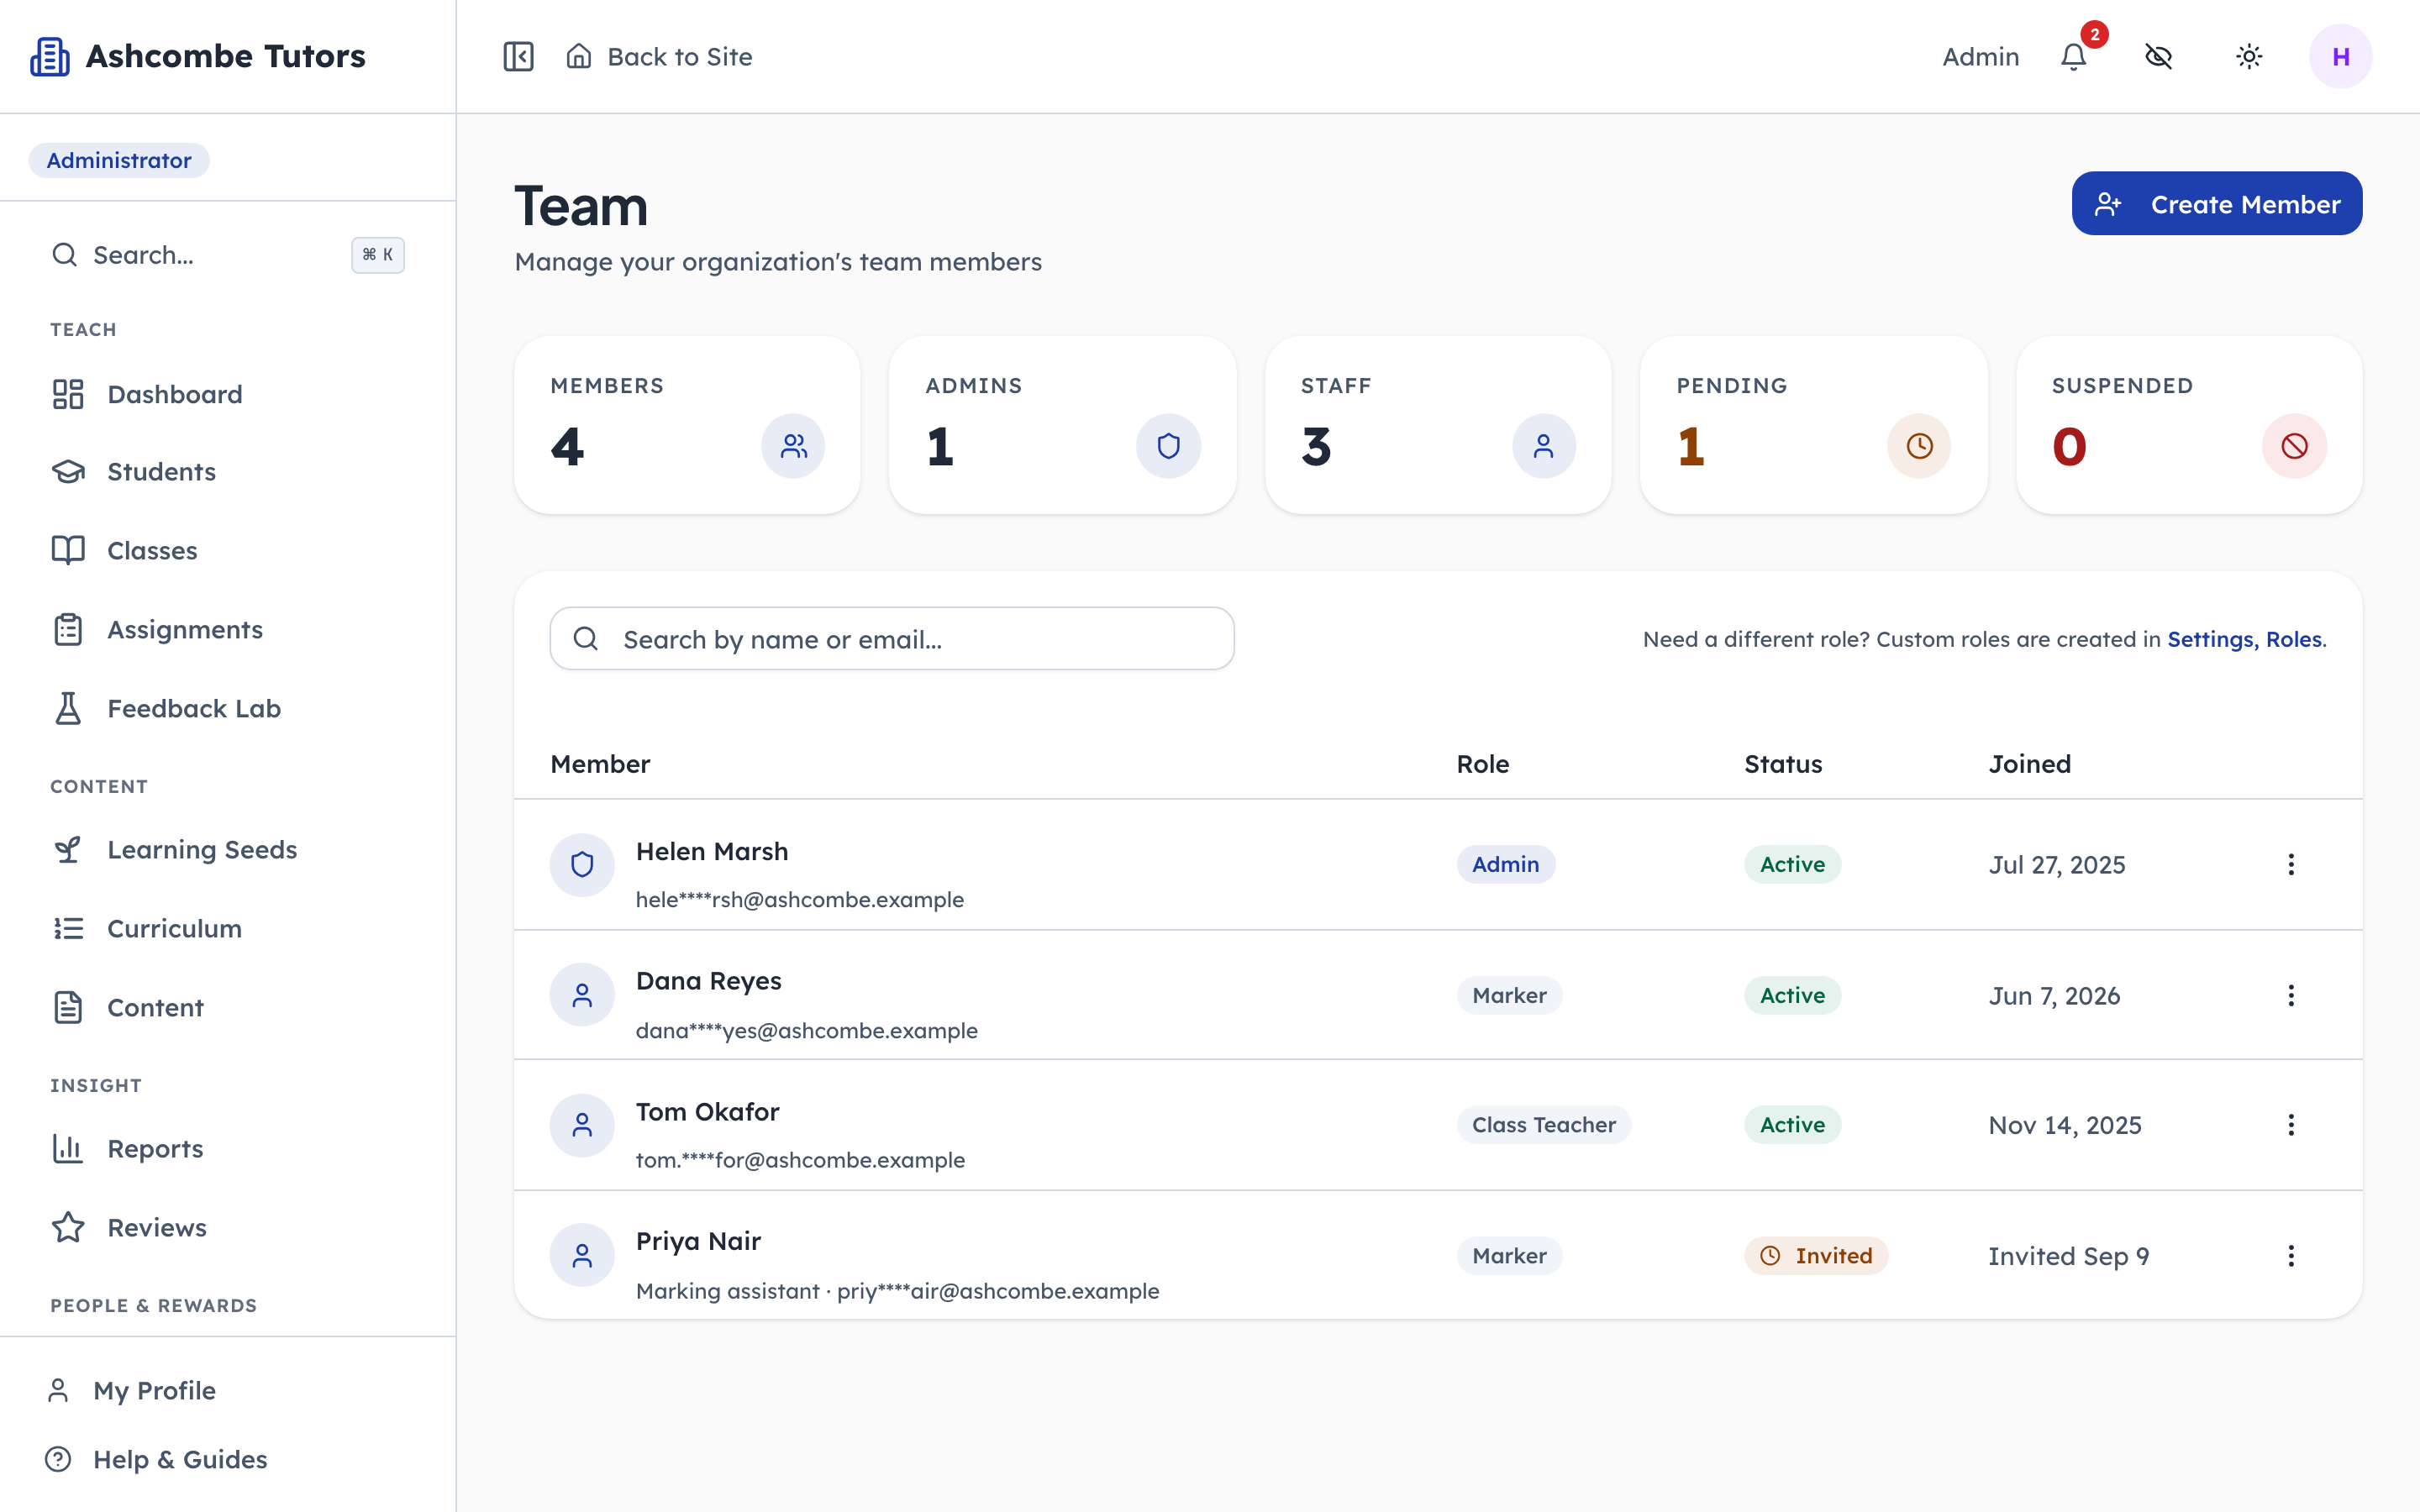
- 1Notice: Created, but not yet activated
- 2Click: Add someone
- 3Notice: Everything else lives here
One row per person, with the roles they hold and whether they have activated their account yet. The counters along the top are worth a glance each morning: a Pending member has been created but has never signed in, so their setup link may need sending again.
- penleap.com/dashboard/team/newSigned in as Org Admin
2Who they are, and the address they sign in with 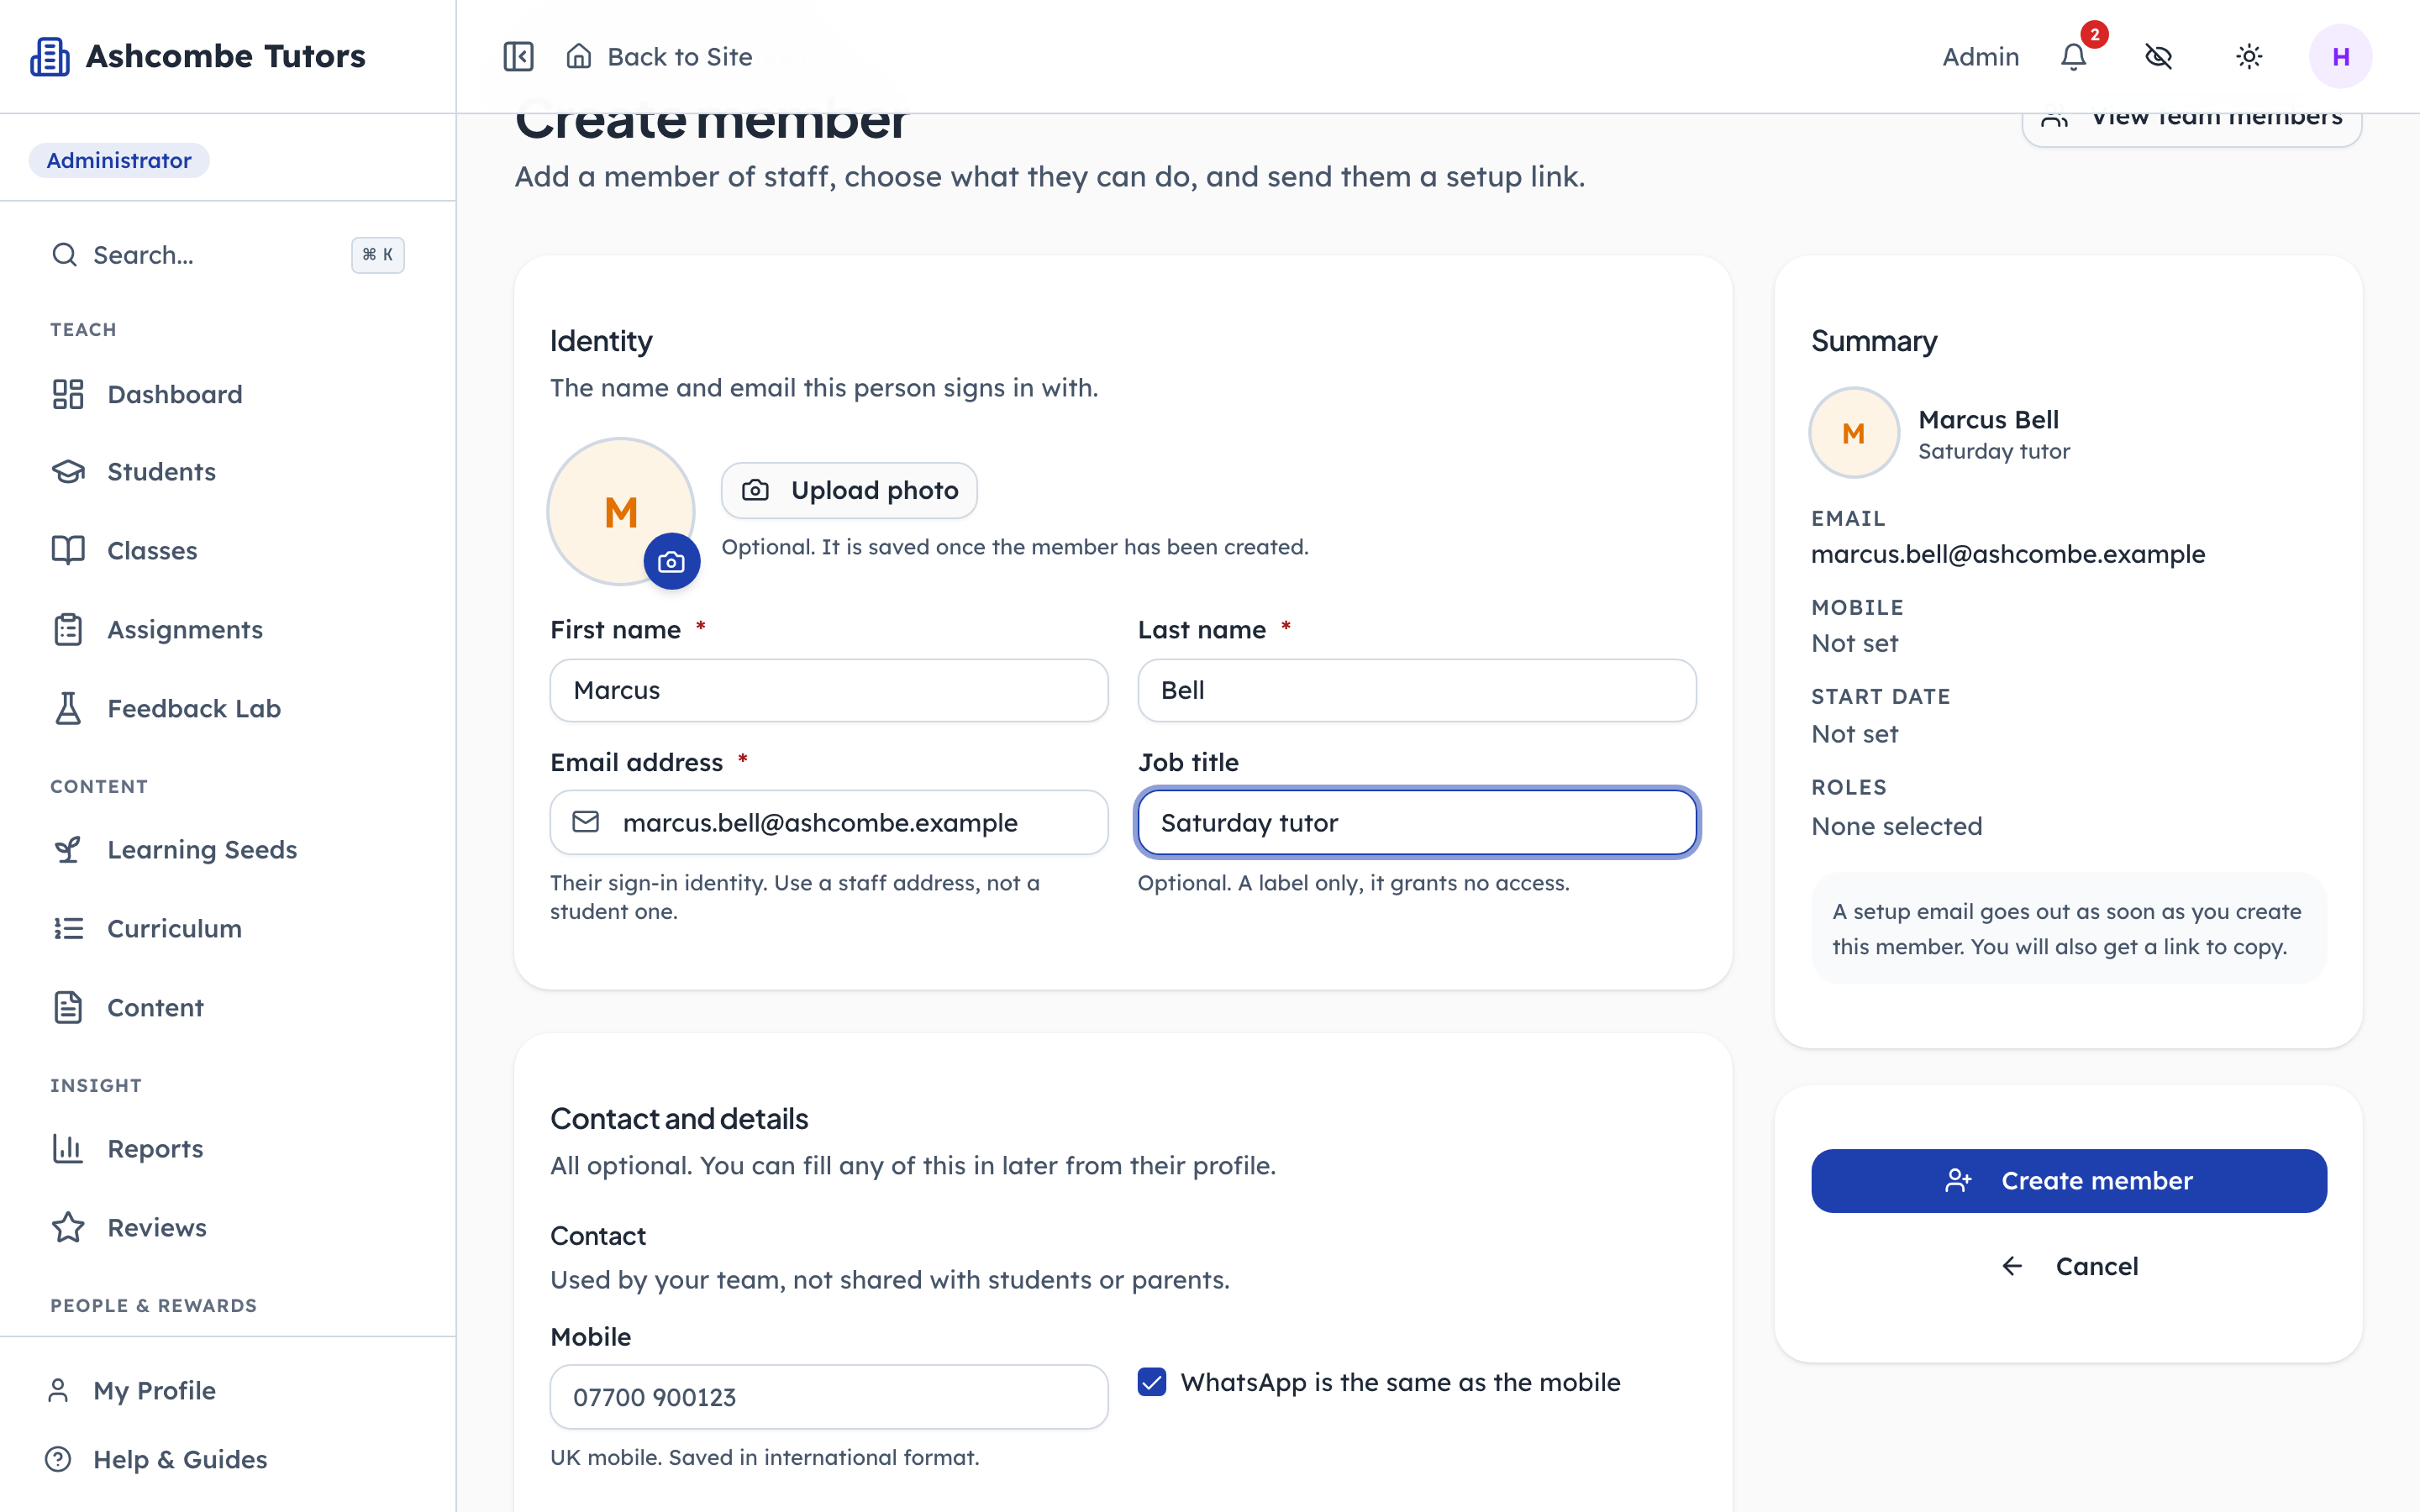
- 1Type in: Their name
- 2Type in: Their sign-in address
- 3Type in: A label only, grants nothing
Two names and a work email are all that is required. The email is their identity at the centre, so it should be theirs, not a shared office inbox. A job title is a label for colleagues and grants nothing.
- penleap.com/dashboard/team/newSigned in as Org Admin
3Choose what they can do by ticking one or more roles 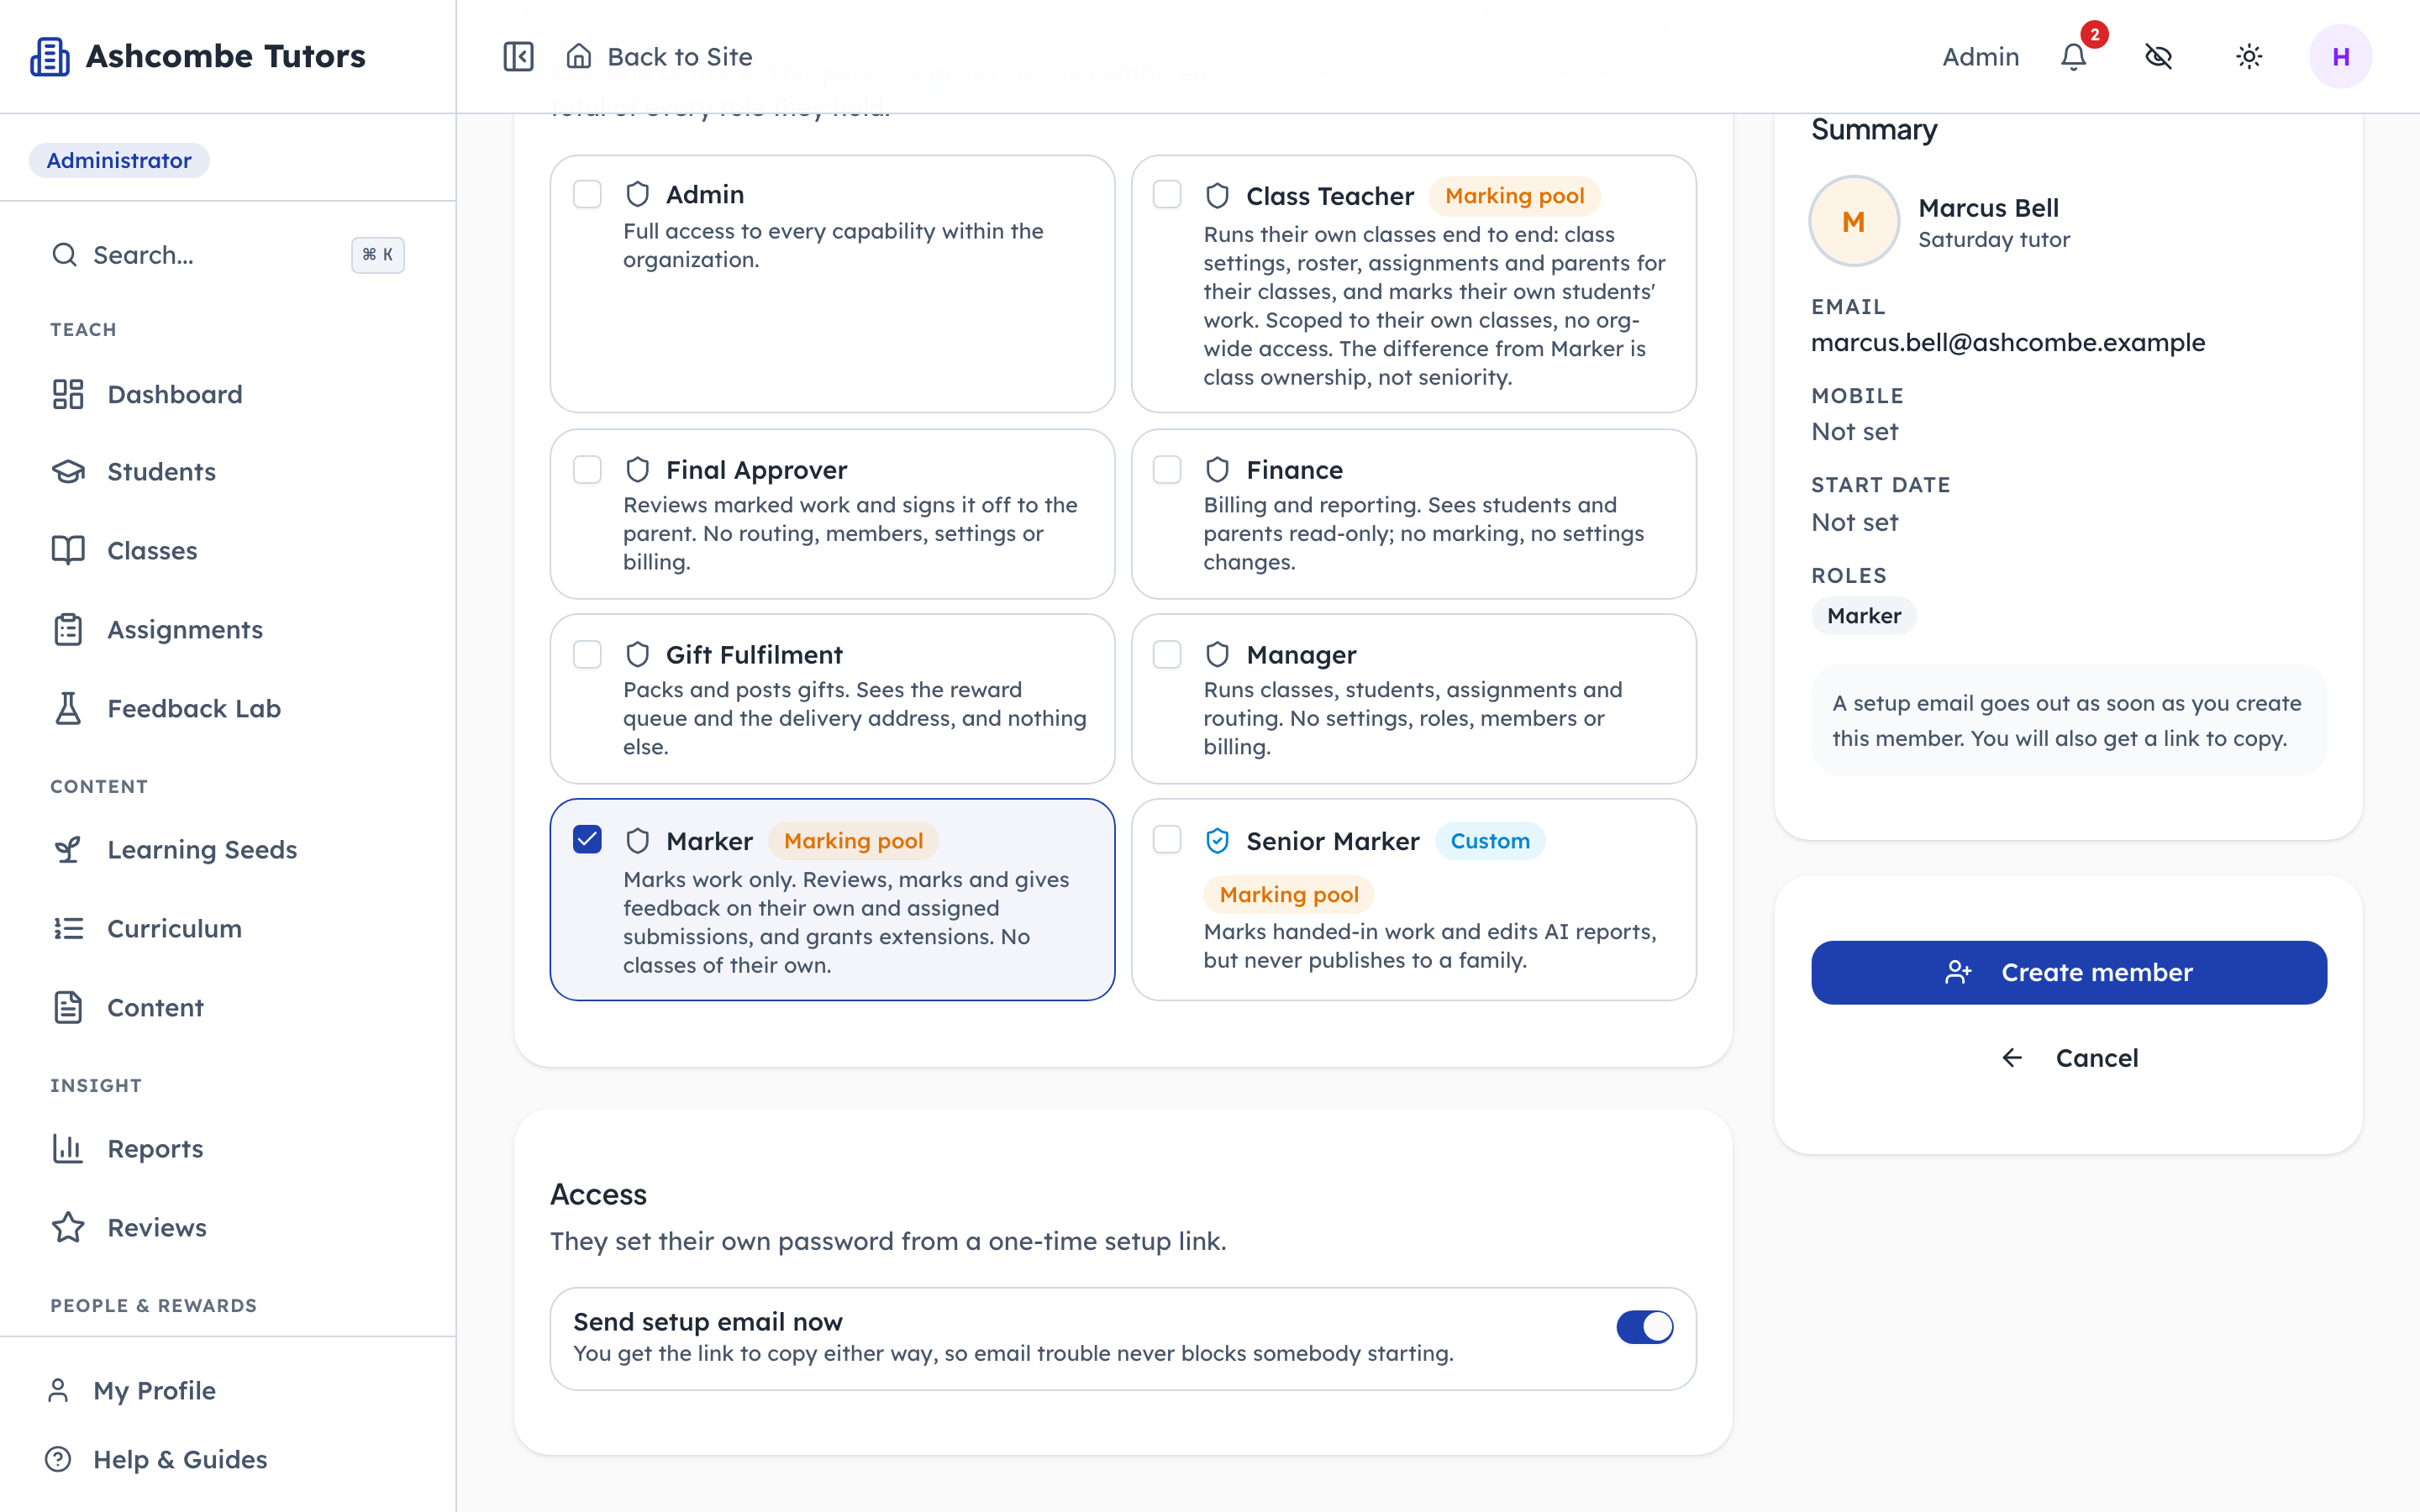
- 1Click: Tick a role
- 2Notice: Custom roles appear here too
- 3Notice: Email them a setup link now, or not
- 4Click: Create them
Roles stack. Someone who is both a Marker and a Senior Marker can do everything either role allows. The roles that ship with every centre cover most cases; the custom one here was made by this centre, and it shows up in the same list. No password ever passes through you: creating the member produces a setup link that lasts seven days, emailed straight away if the switch is on.
- penleap.com/dashboard/team/…Signed in as Org Admin
4A member who has not activated yet 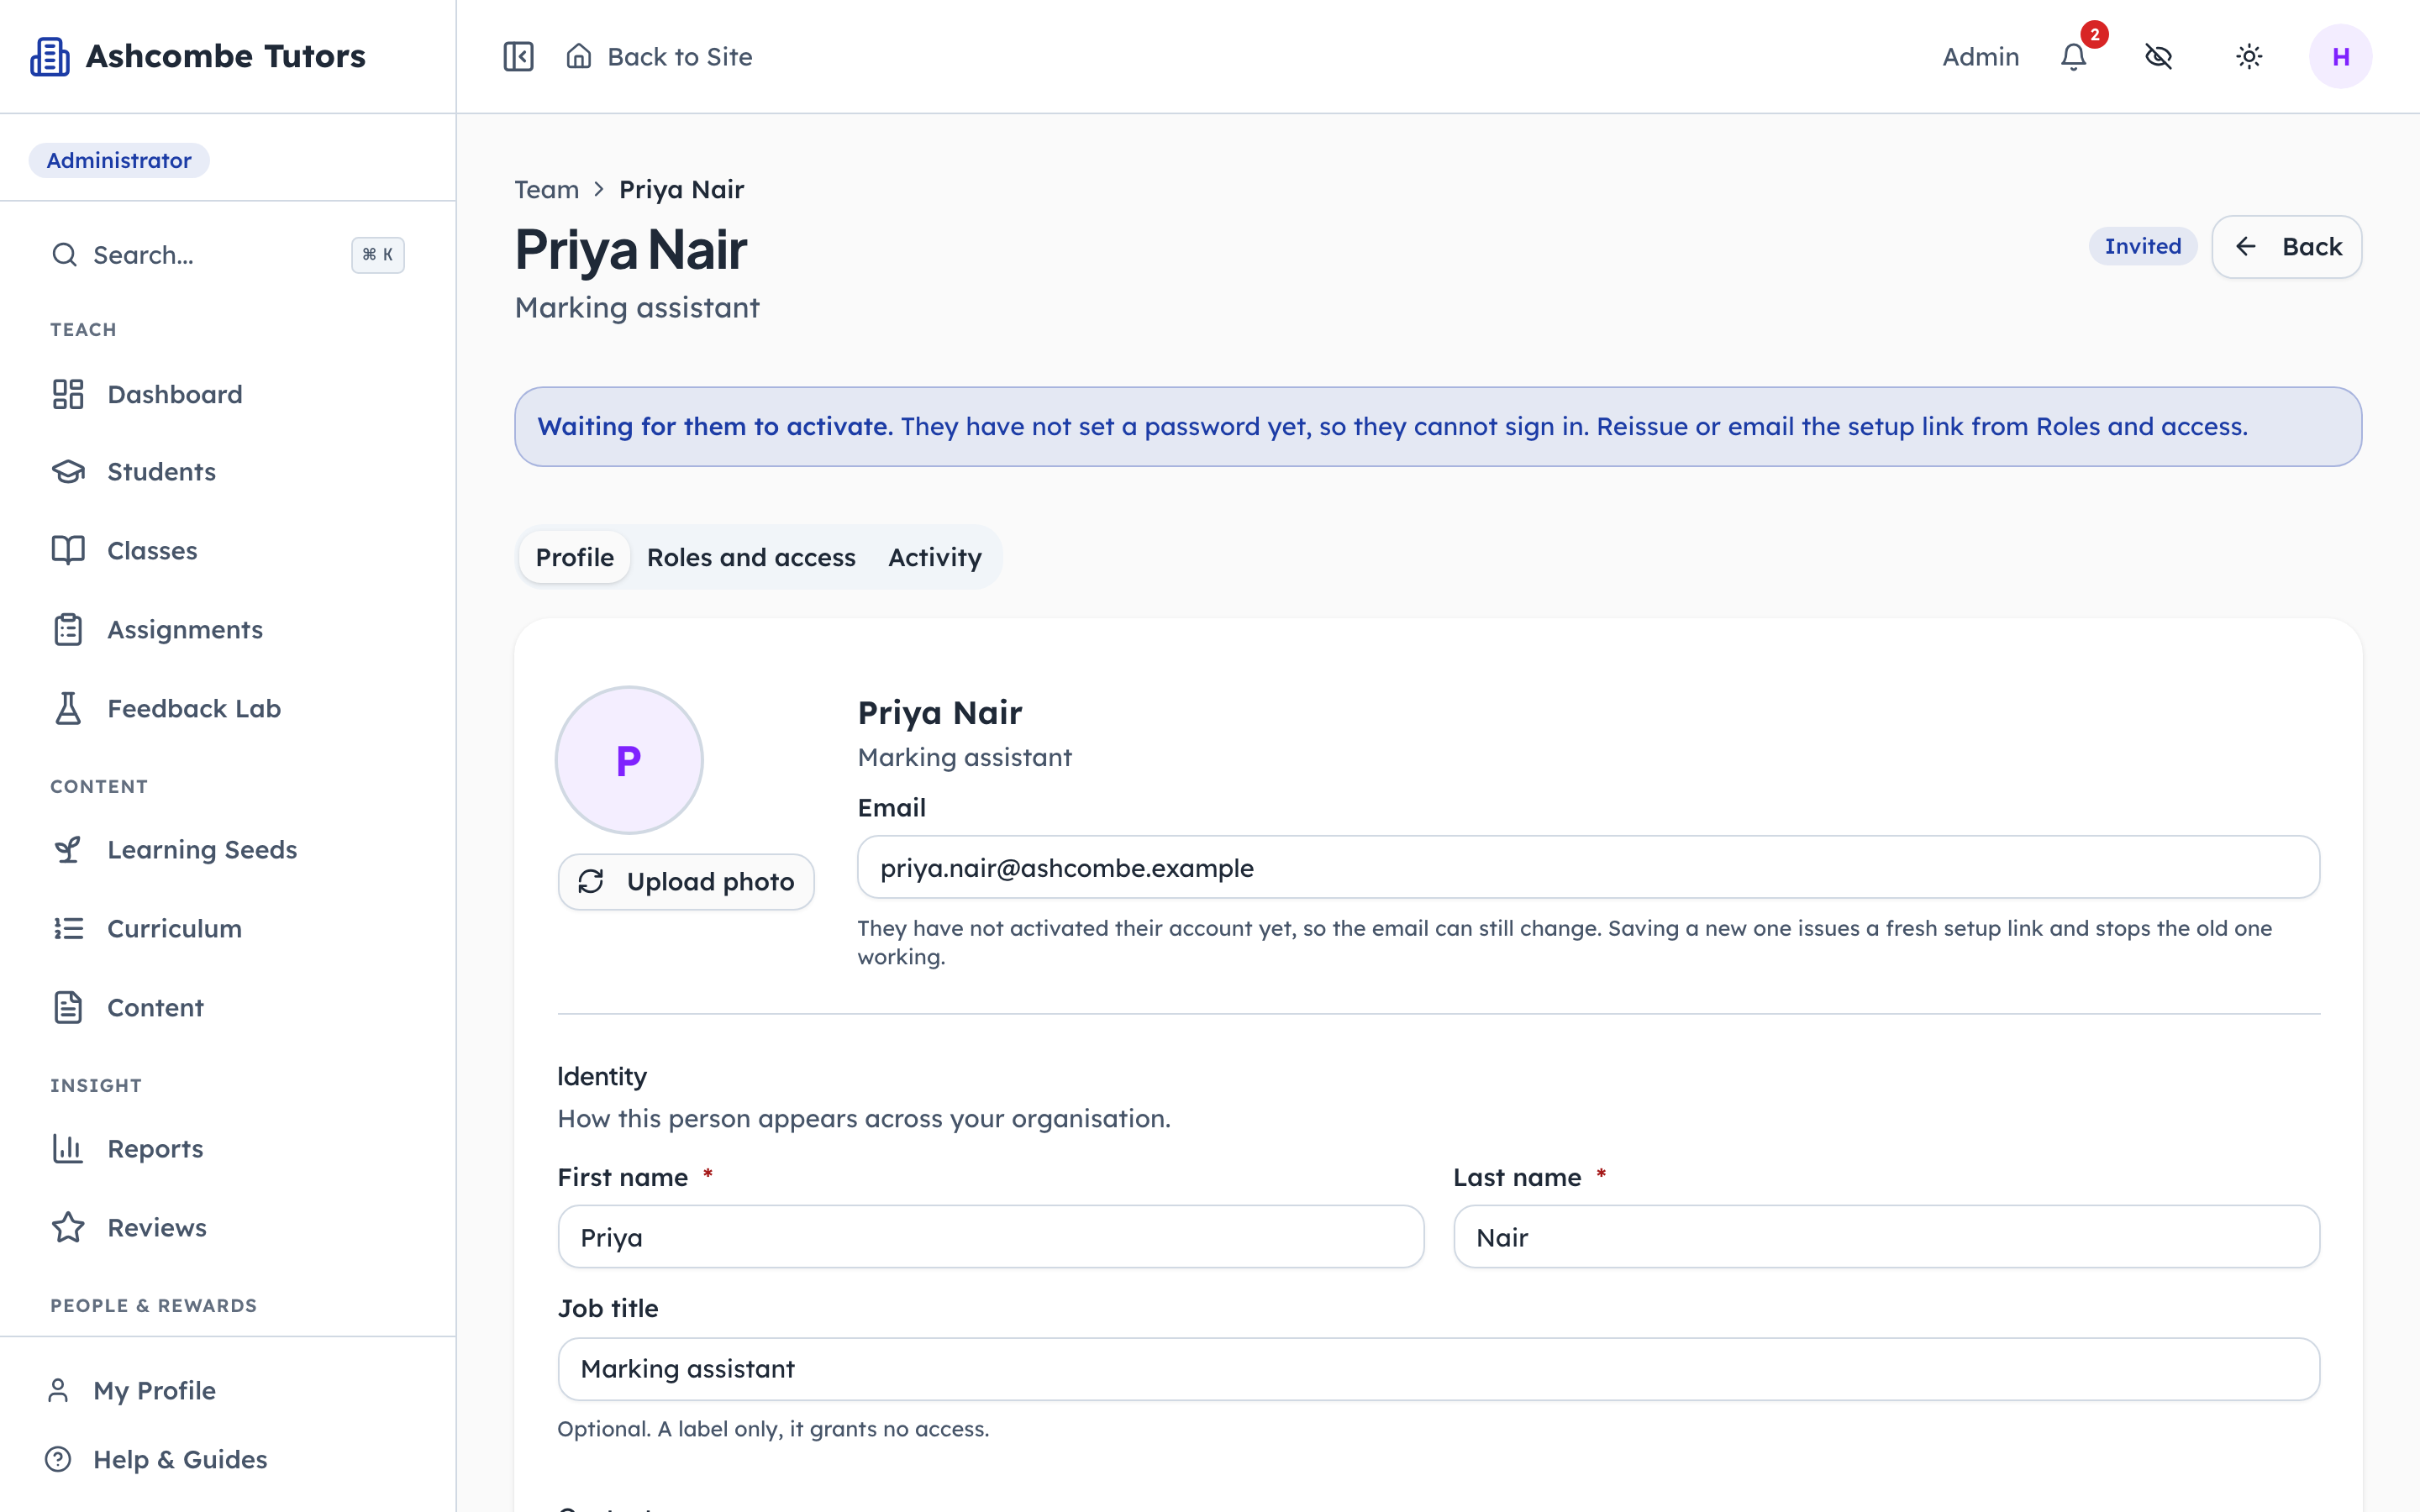
- 1Notice: Why they cannot sign in yet
- 2Click: Their link and their roles
Until they use their link they cannot sign in, and the page says so. The email can still be corrected at this stage; changing it issues a fresh link and voids the old one.
- penleap.com/dashboard/team/…Signed in as Org Admin
5Reissue or email the setup link from their record 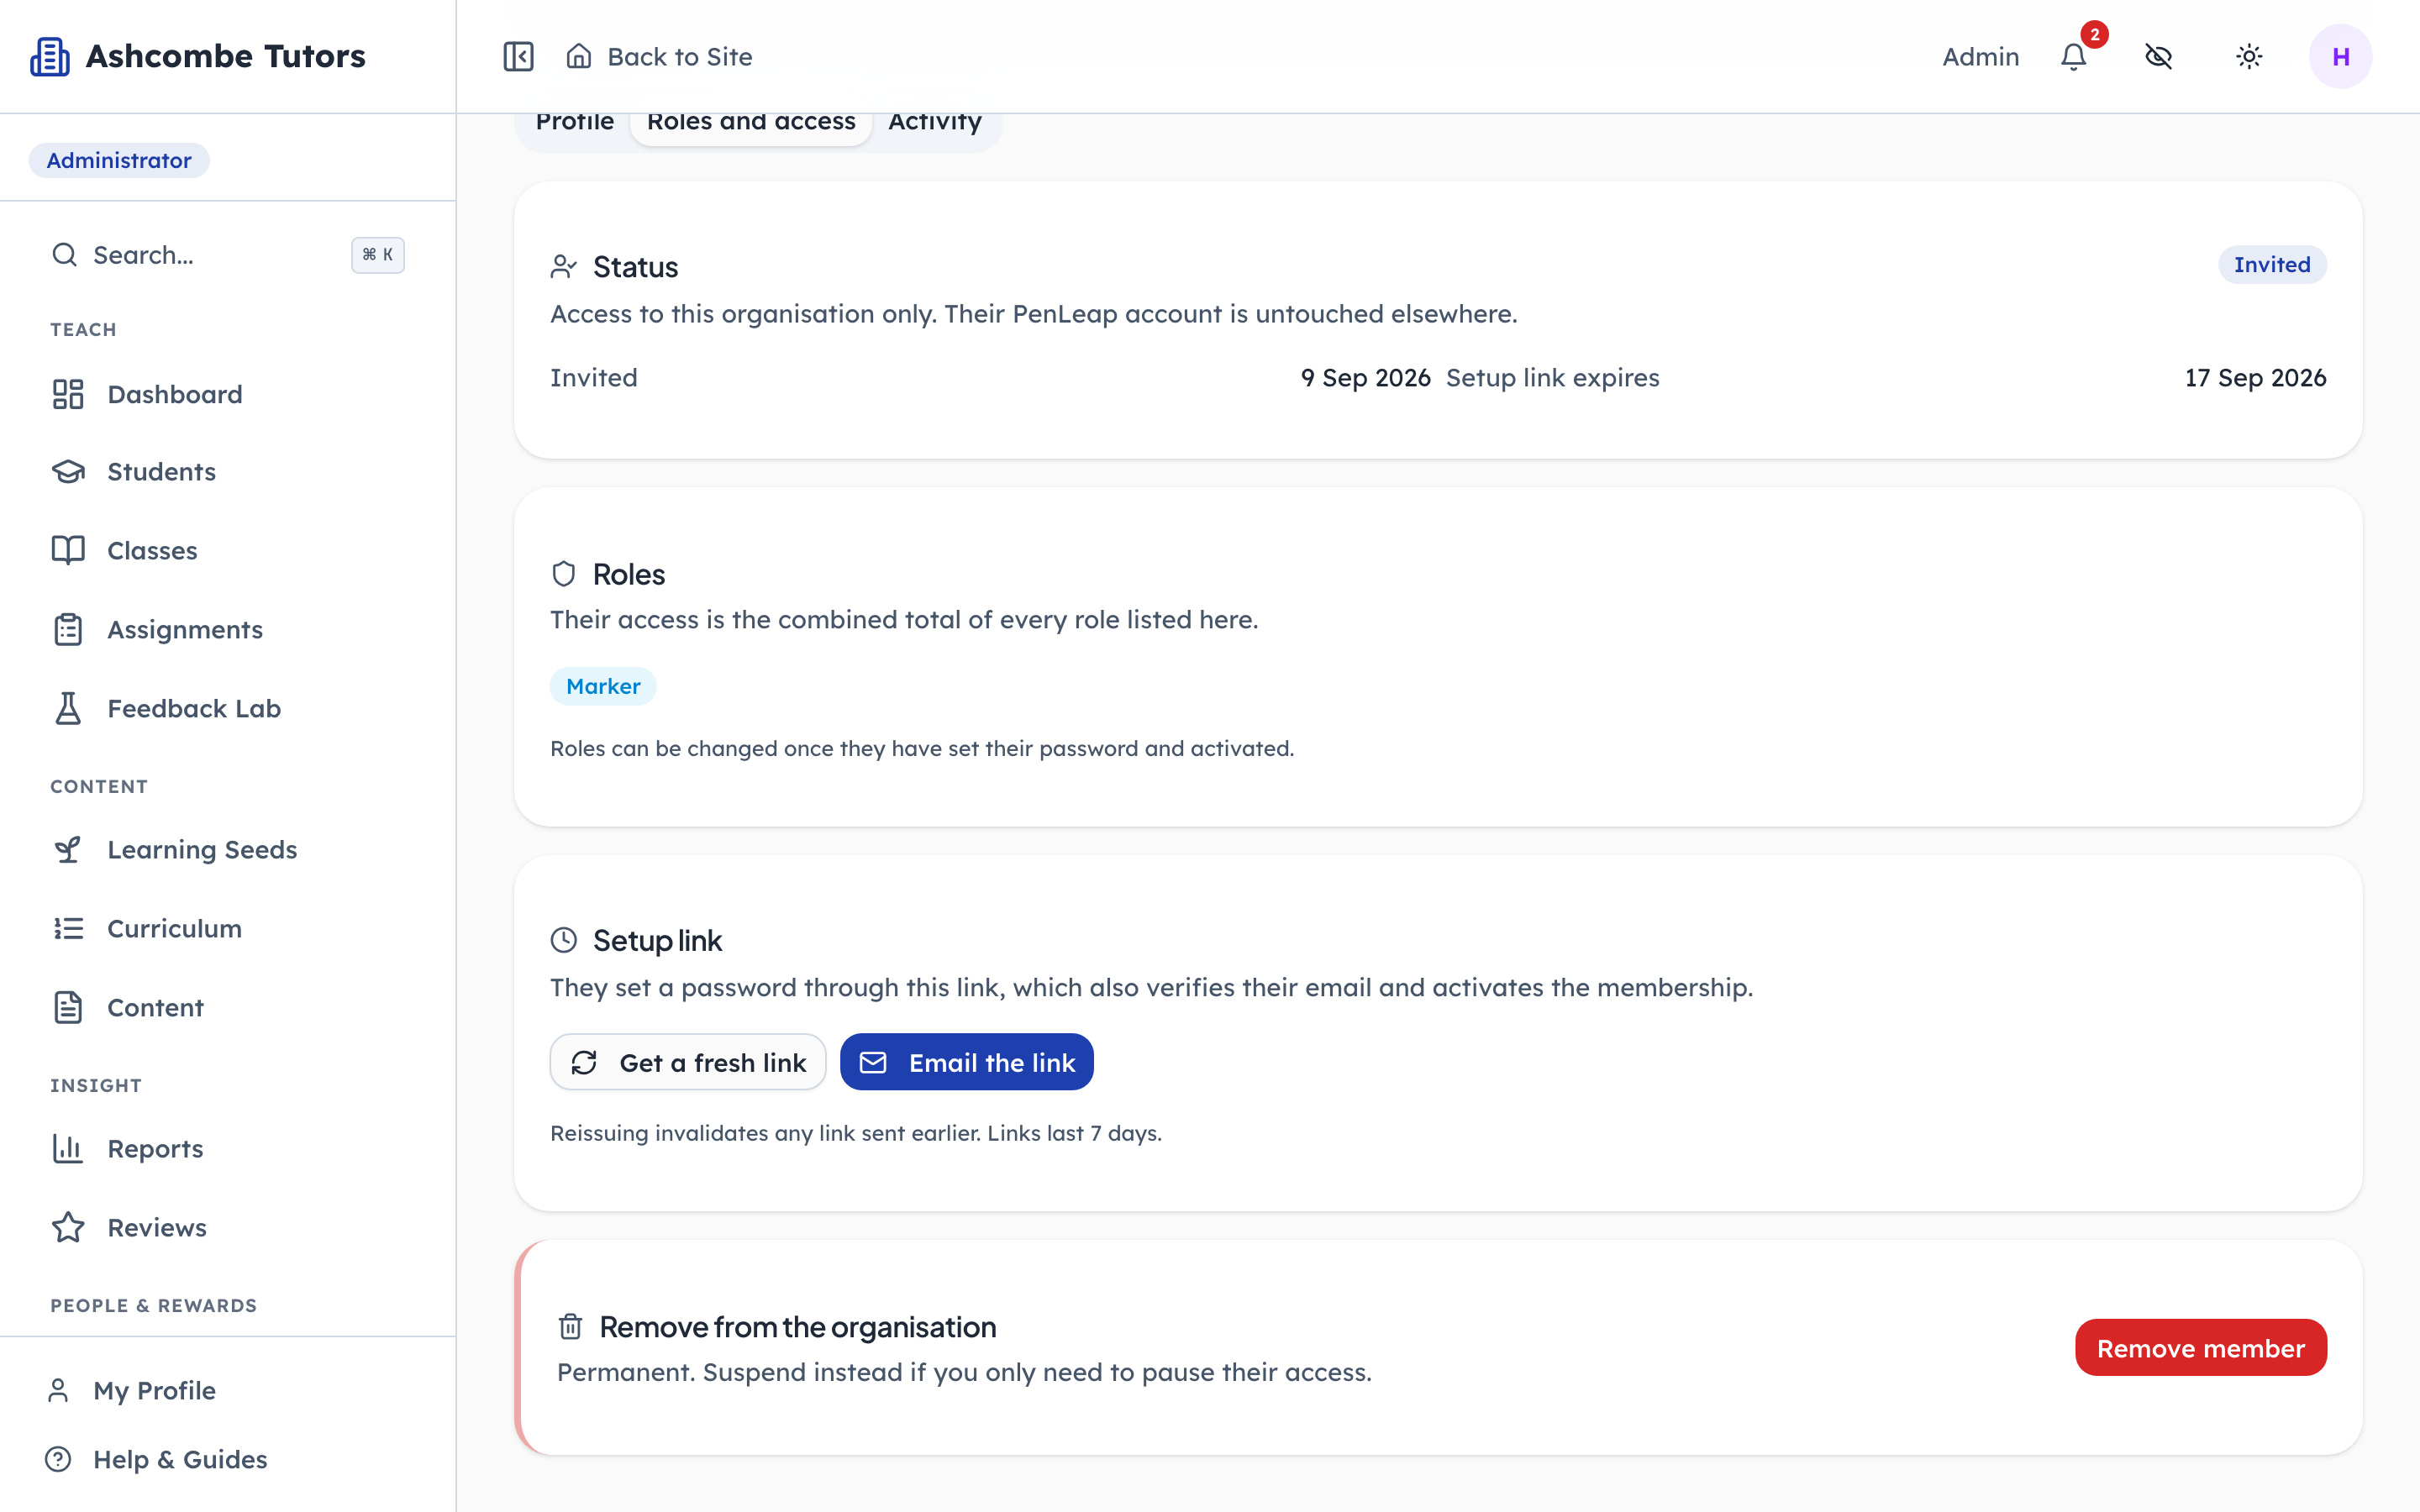
- 1Click: A new link to hand over
- 2Notice: Or send it again
A link that expired, or went to a spam folder, is a thirty-second fix. Get a fresh one to paste into a message, or have it emailed again. Once they have activated, this same tab is where their roles are changed and their access paused.
Roles decide what each person can do
Steps 6–8Org Admin- penleap.com/dashboard/settingsSigned in as Org Admin
6Every role at the centre, system and custom 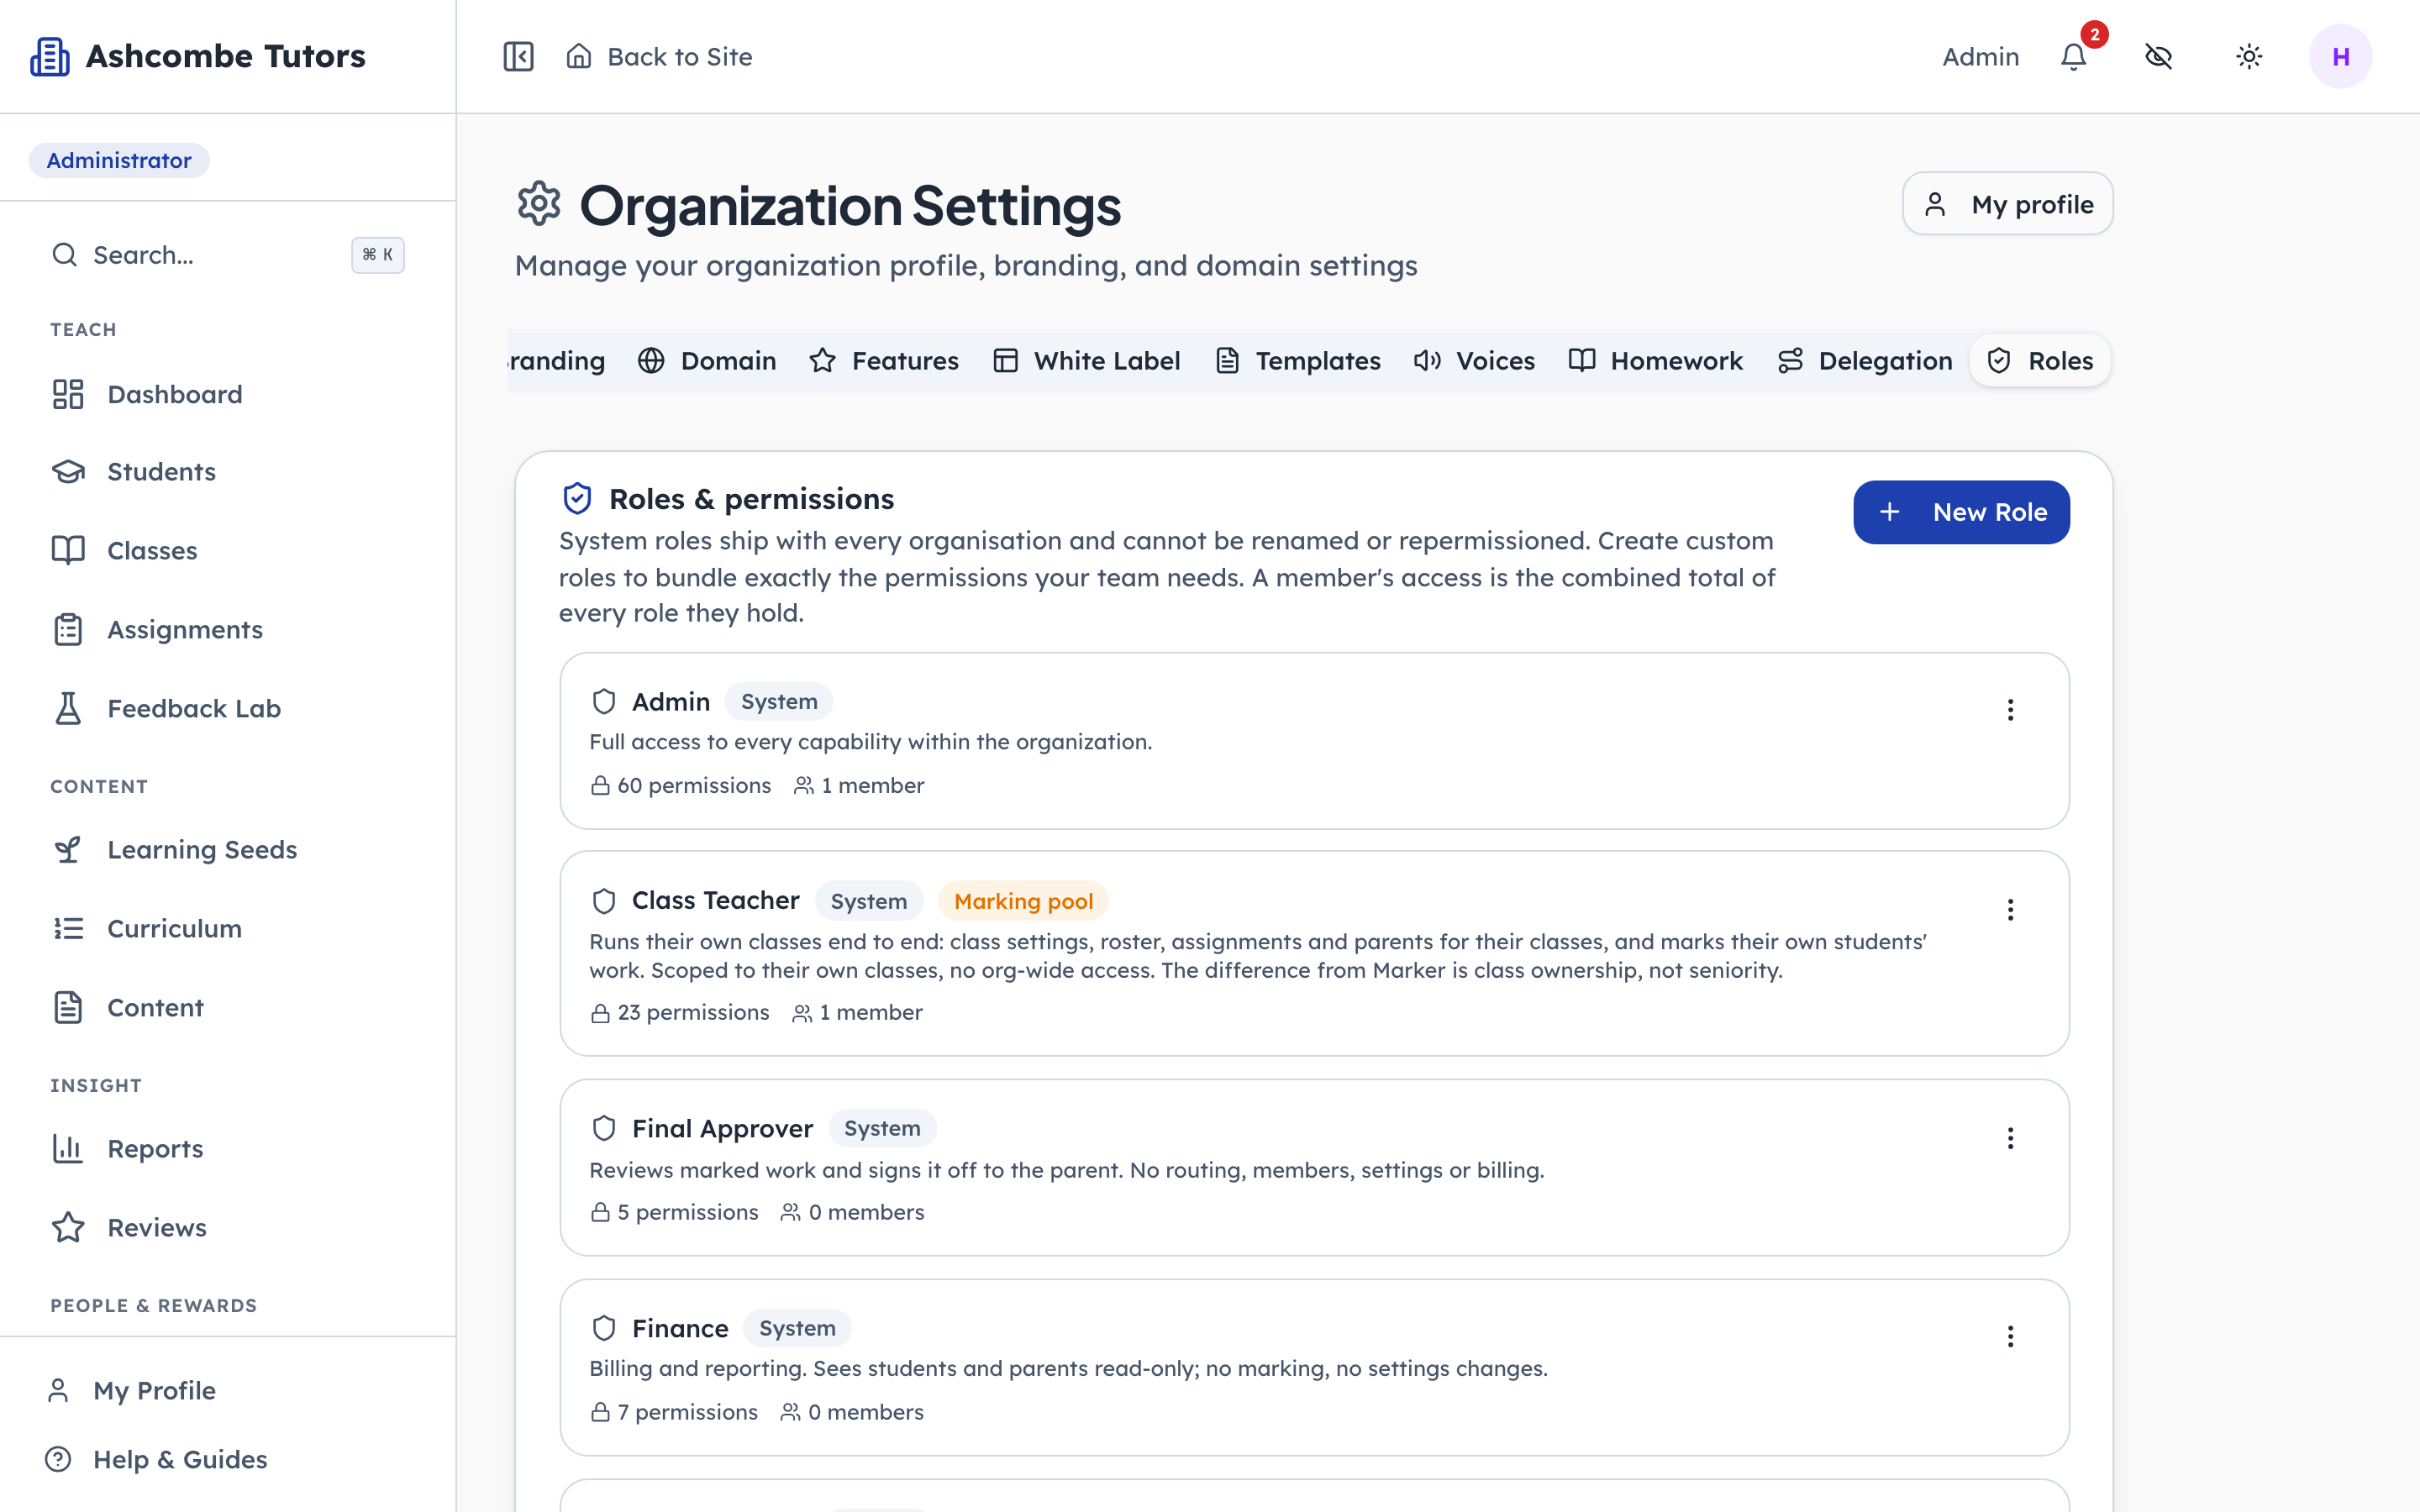
- 1Click: Make your own
- 2Notice: Ships with every centre
- 3Notice: Can be handed marking
System roles ship with every centre and cannot be edited, which is what makes them safe to rely on. A custom role is your own bundle of permissions. The Marking pool badge is the one to understand: only people holding a pool role can be handed work.
- penleap.com/dashboard/settingsSigned in as Org Admin
7A custom role is a name and a set of ticks 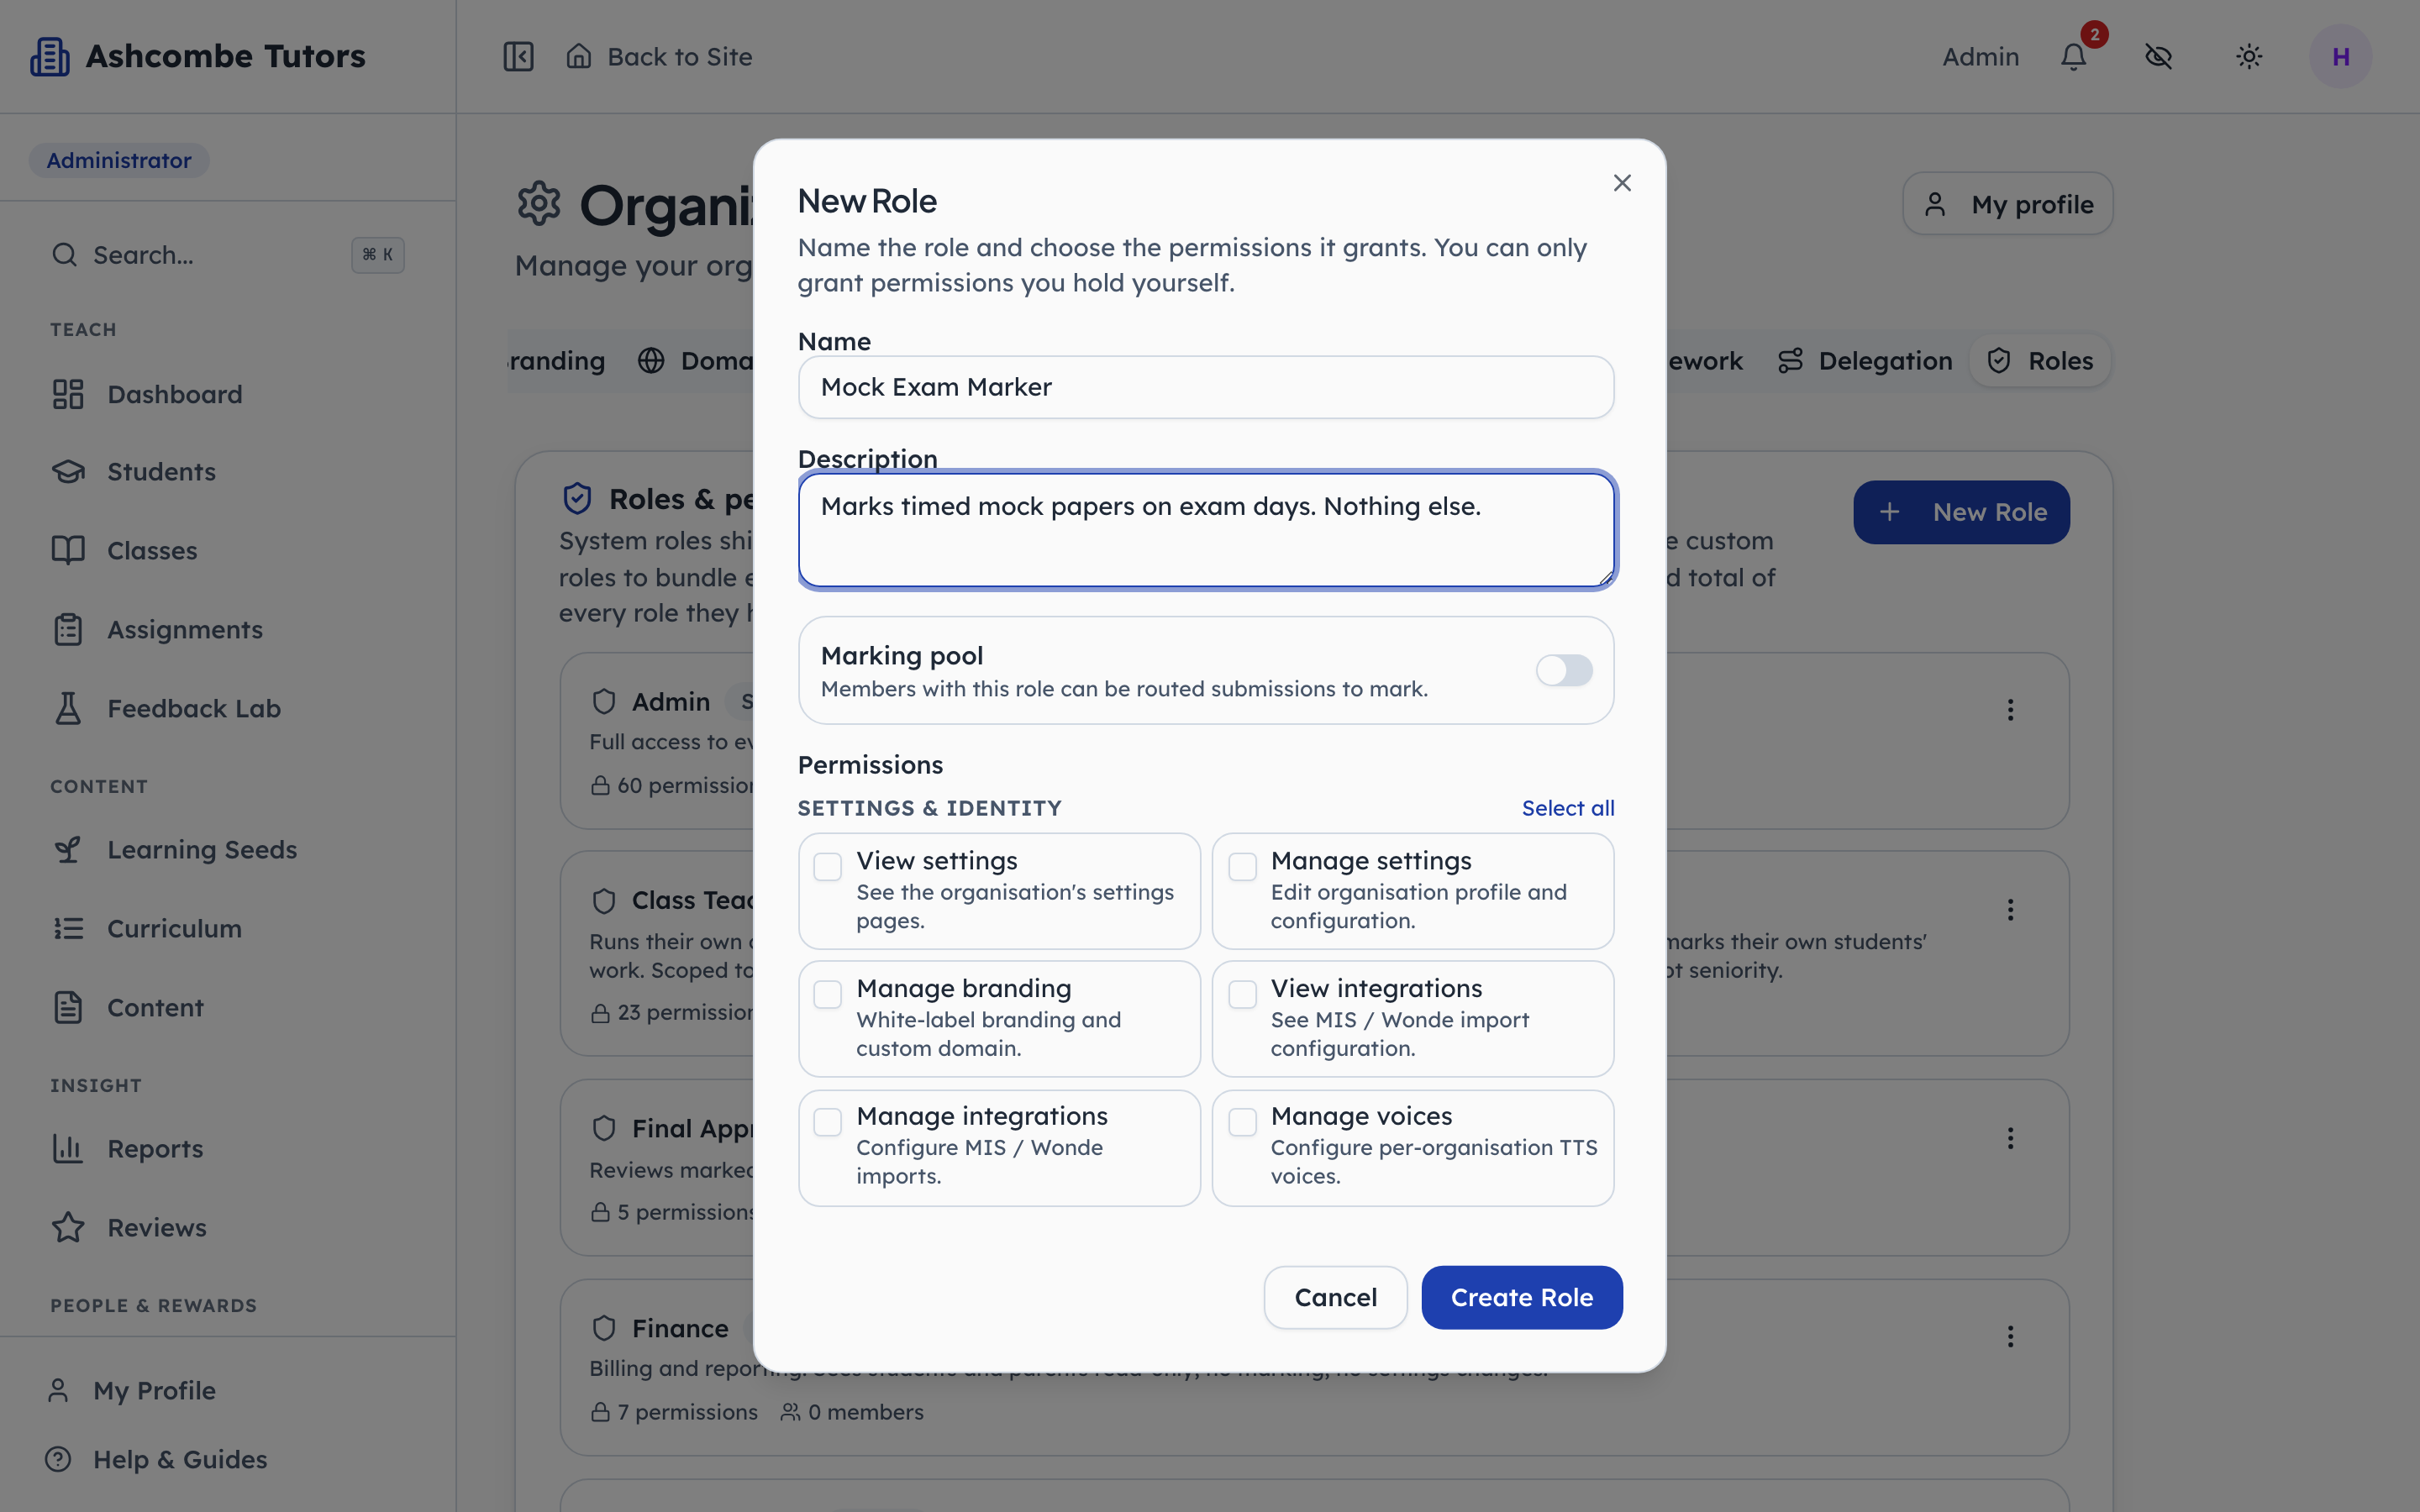
- 1Type in: Name it for the job
- 2Click: Lets them be handed work
- 3Notice: Whole areas at once
Permissions are grouped by area, with a select-all per group. You can only grant what you hold yourself. The Marking pool switch is the one that matters for routing: turn it on and anyone with this role can be given submissions to mark.
- penleap.com/dashboard/teamSigned in as Org Admin
8Changing someone's roles takes effect the moment you save 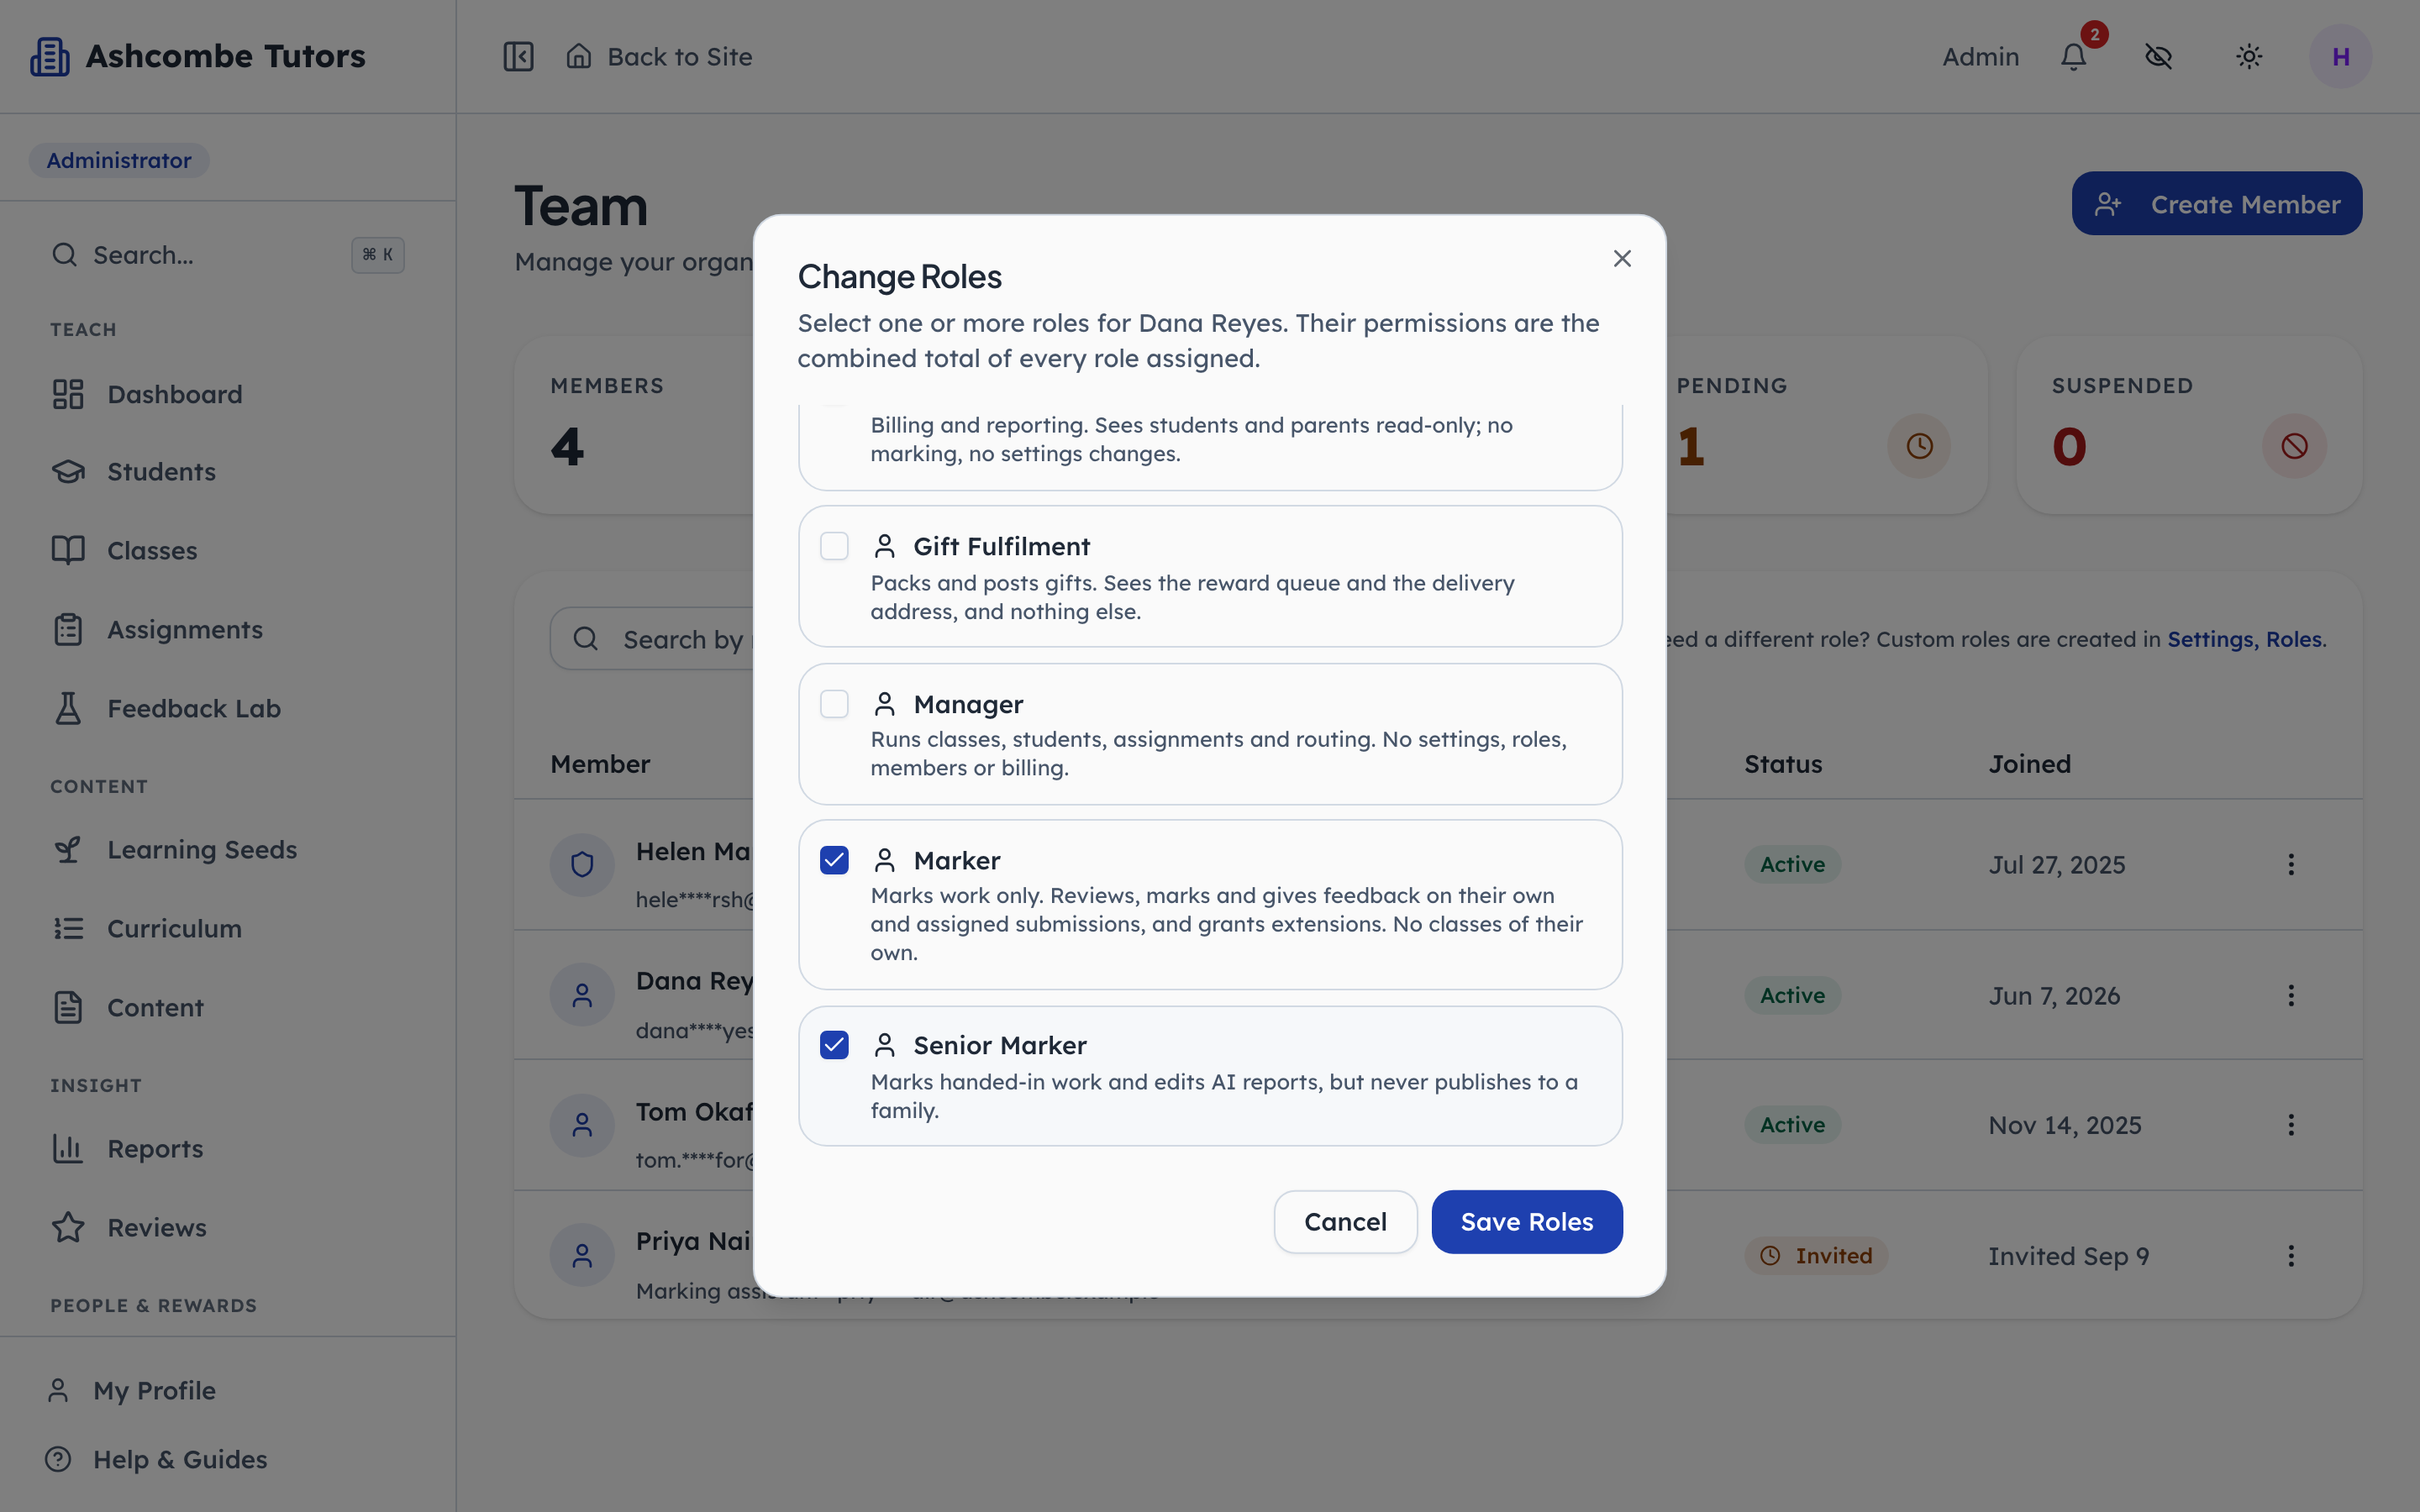
- 1Click: Add a second role
- 2Click: Applies immediately
Roles are a checklist, not a single choice. Adding the custom role to a tutor gives them everything both roles allow. Nobody has to sign out and back in.
Giving people work
Steps 9–12Org Admin- penleap.com/dashboard/settingsSigned in as Org Admin
9Split incoming marking across the team automatically 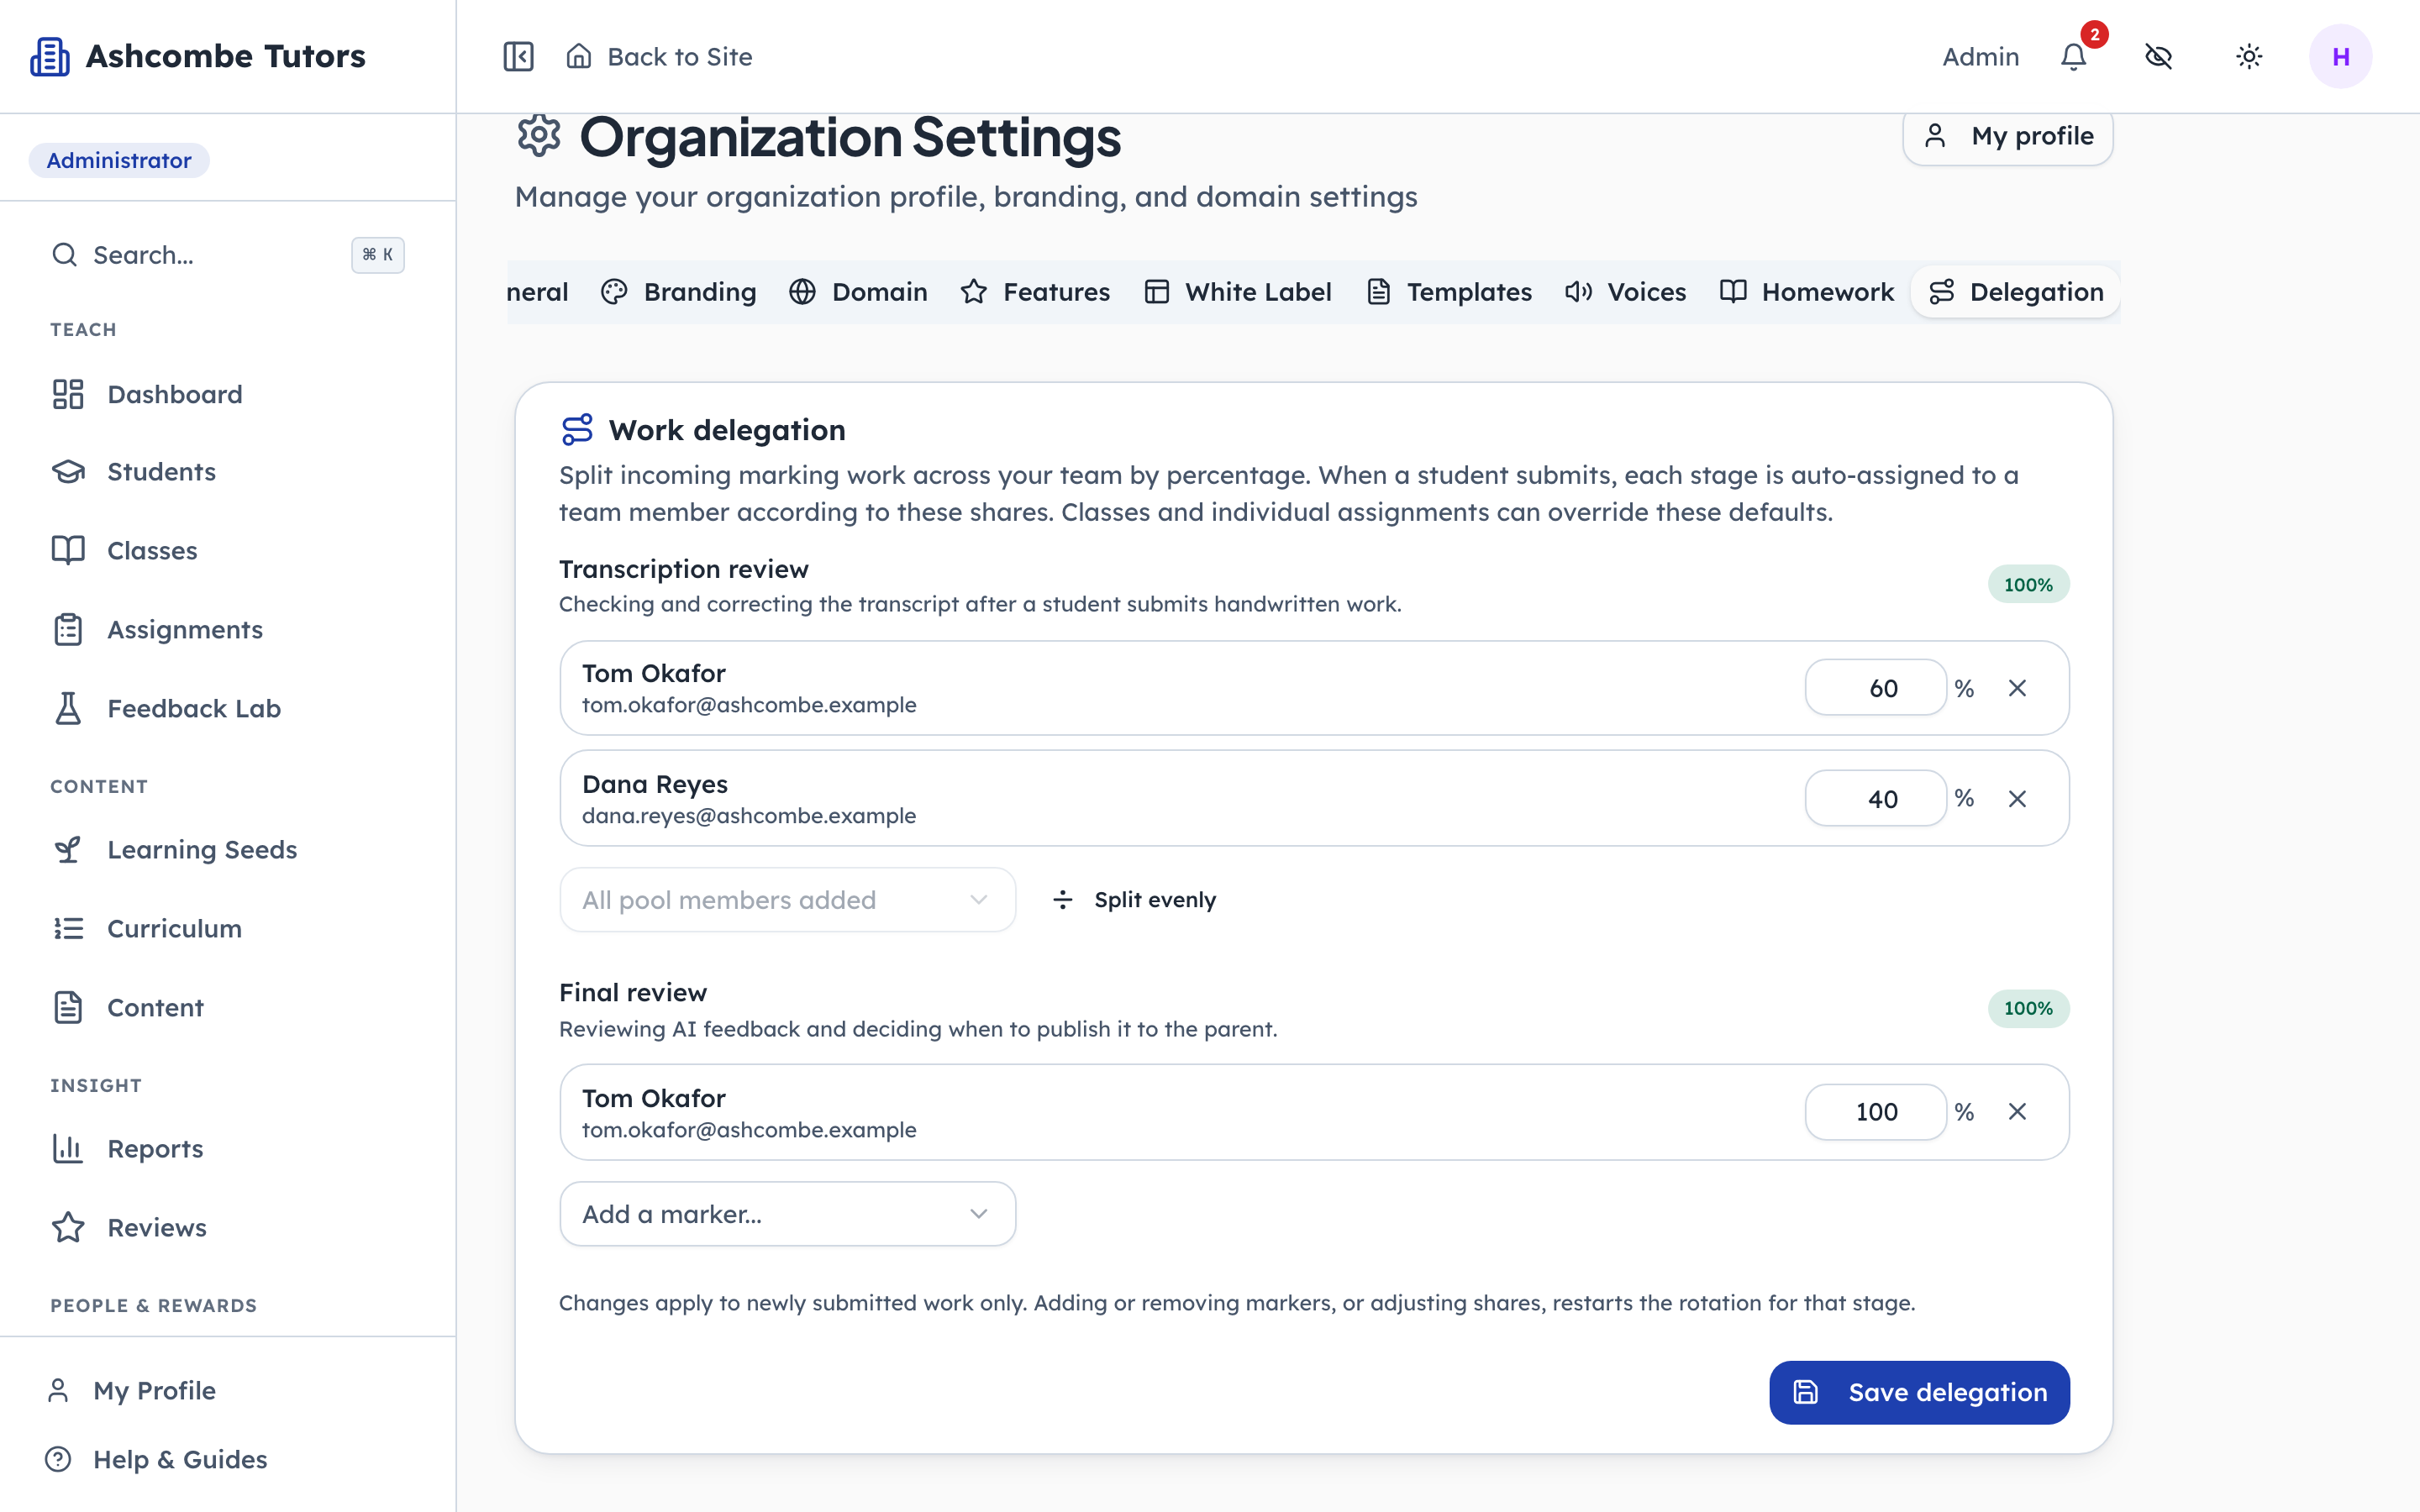
- 1Type in: Their share of new work
- 2Notice: Or share it equally
- 3Click: Save the split
Set a percentage share per person and every new submission is handed out in those proportions the moment it arrives. This is the default for the whole centre; a class or a single assignment can override it. Nobody has to remember to assign anything.
- penleap.com/dashboard/classes?create=1Signed in as Org Admin
10Every class has an owner, and the owner sees its children 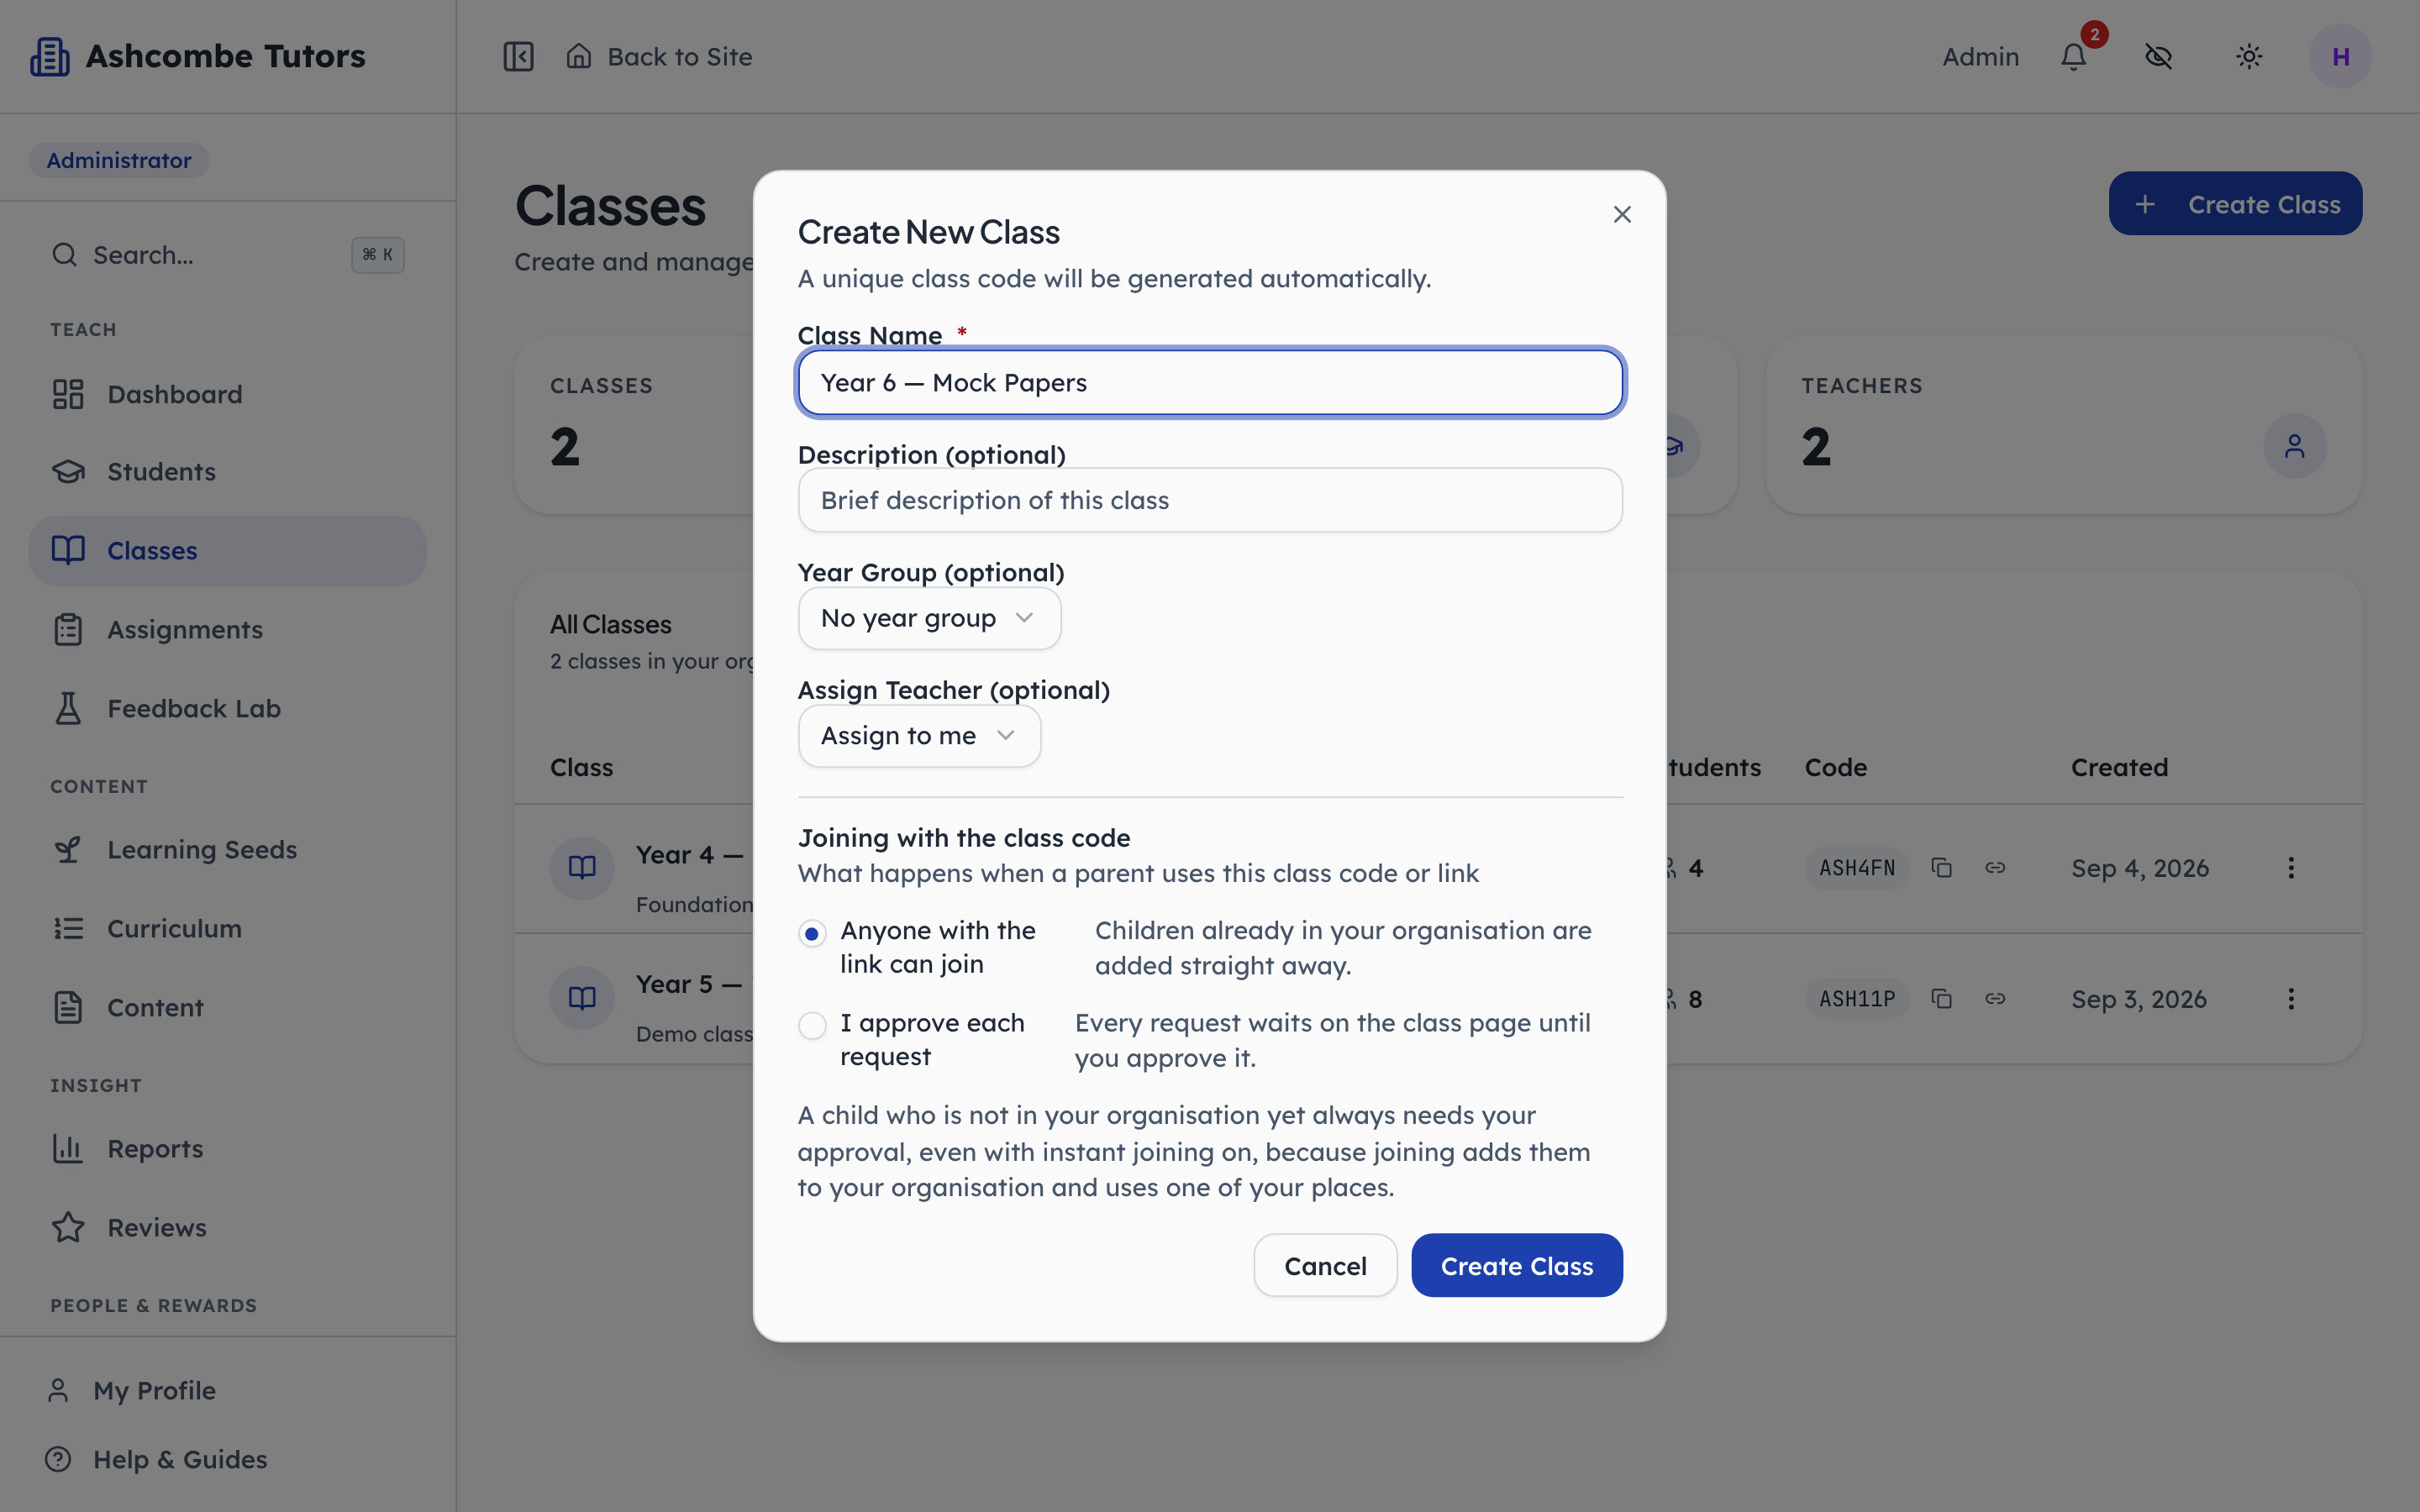
- 1Type in: Name the class
- 2Click: Give it an owner
- 3Notice: Create it
Assigning a teacher to a class is what makes that class theirs: they see its children, its assignments and its submissions everywhere in the product, and nothing from classes they do not own. Leave it blank and the class is yours.
- penleap.com/dashboard/submissionsSigned in as Org Admin
11Hand several pieces of work to one person from the queue 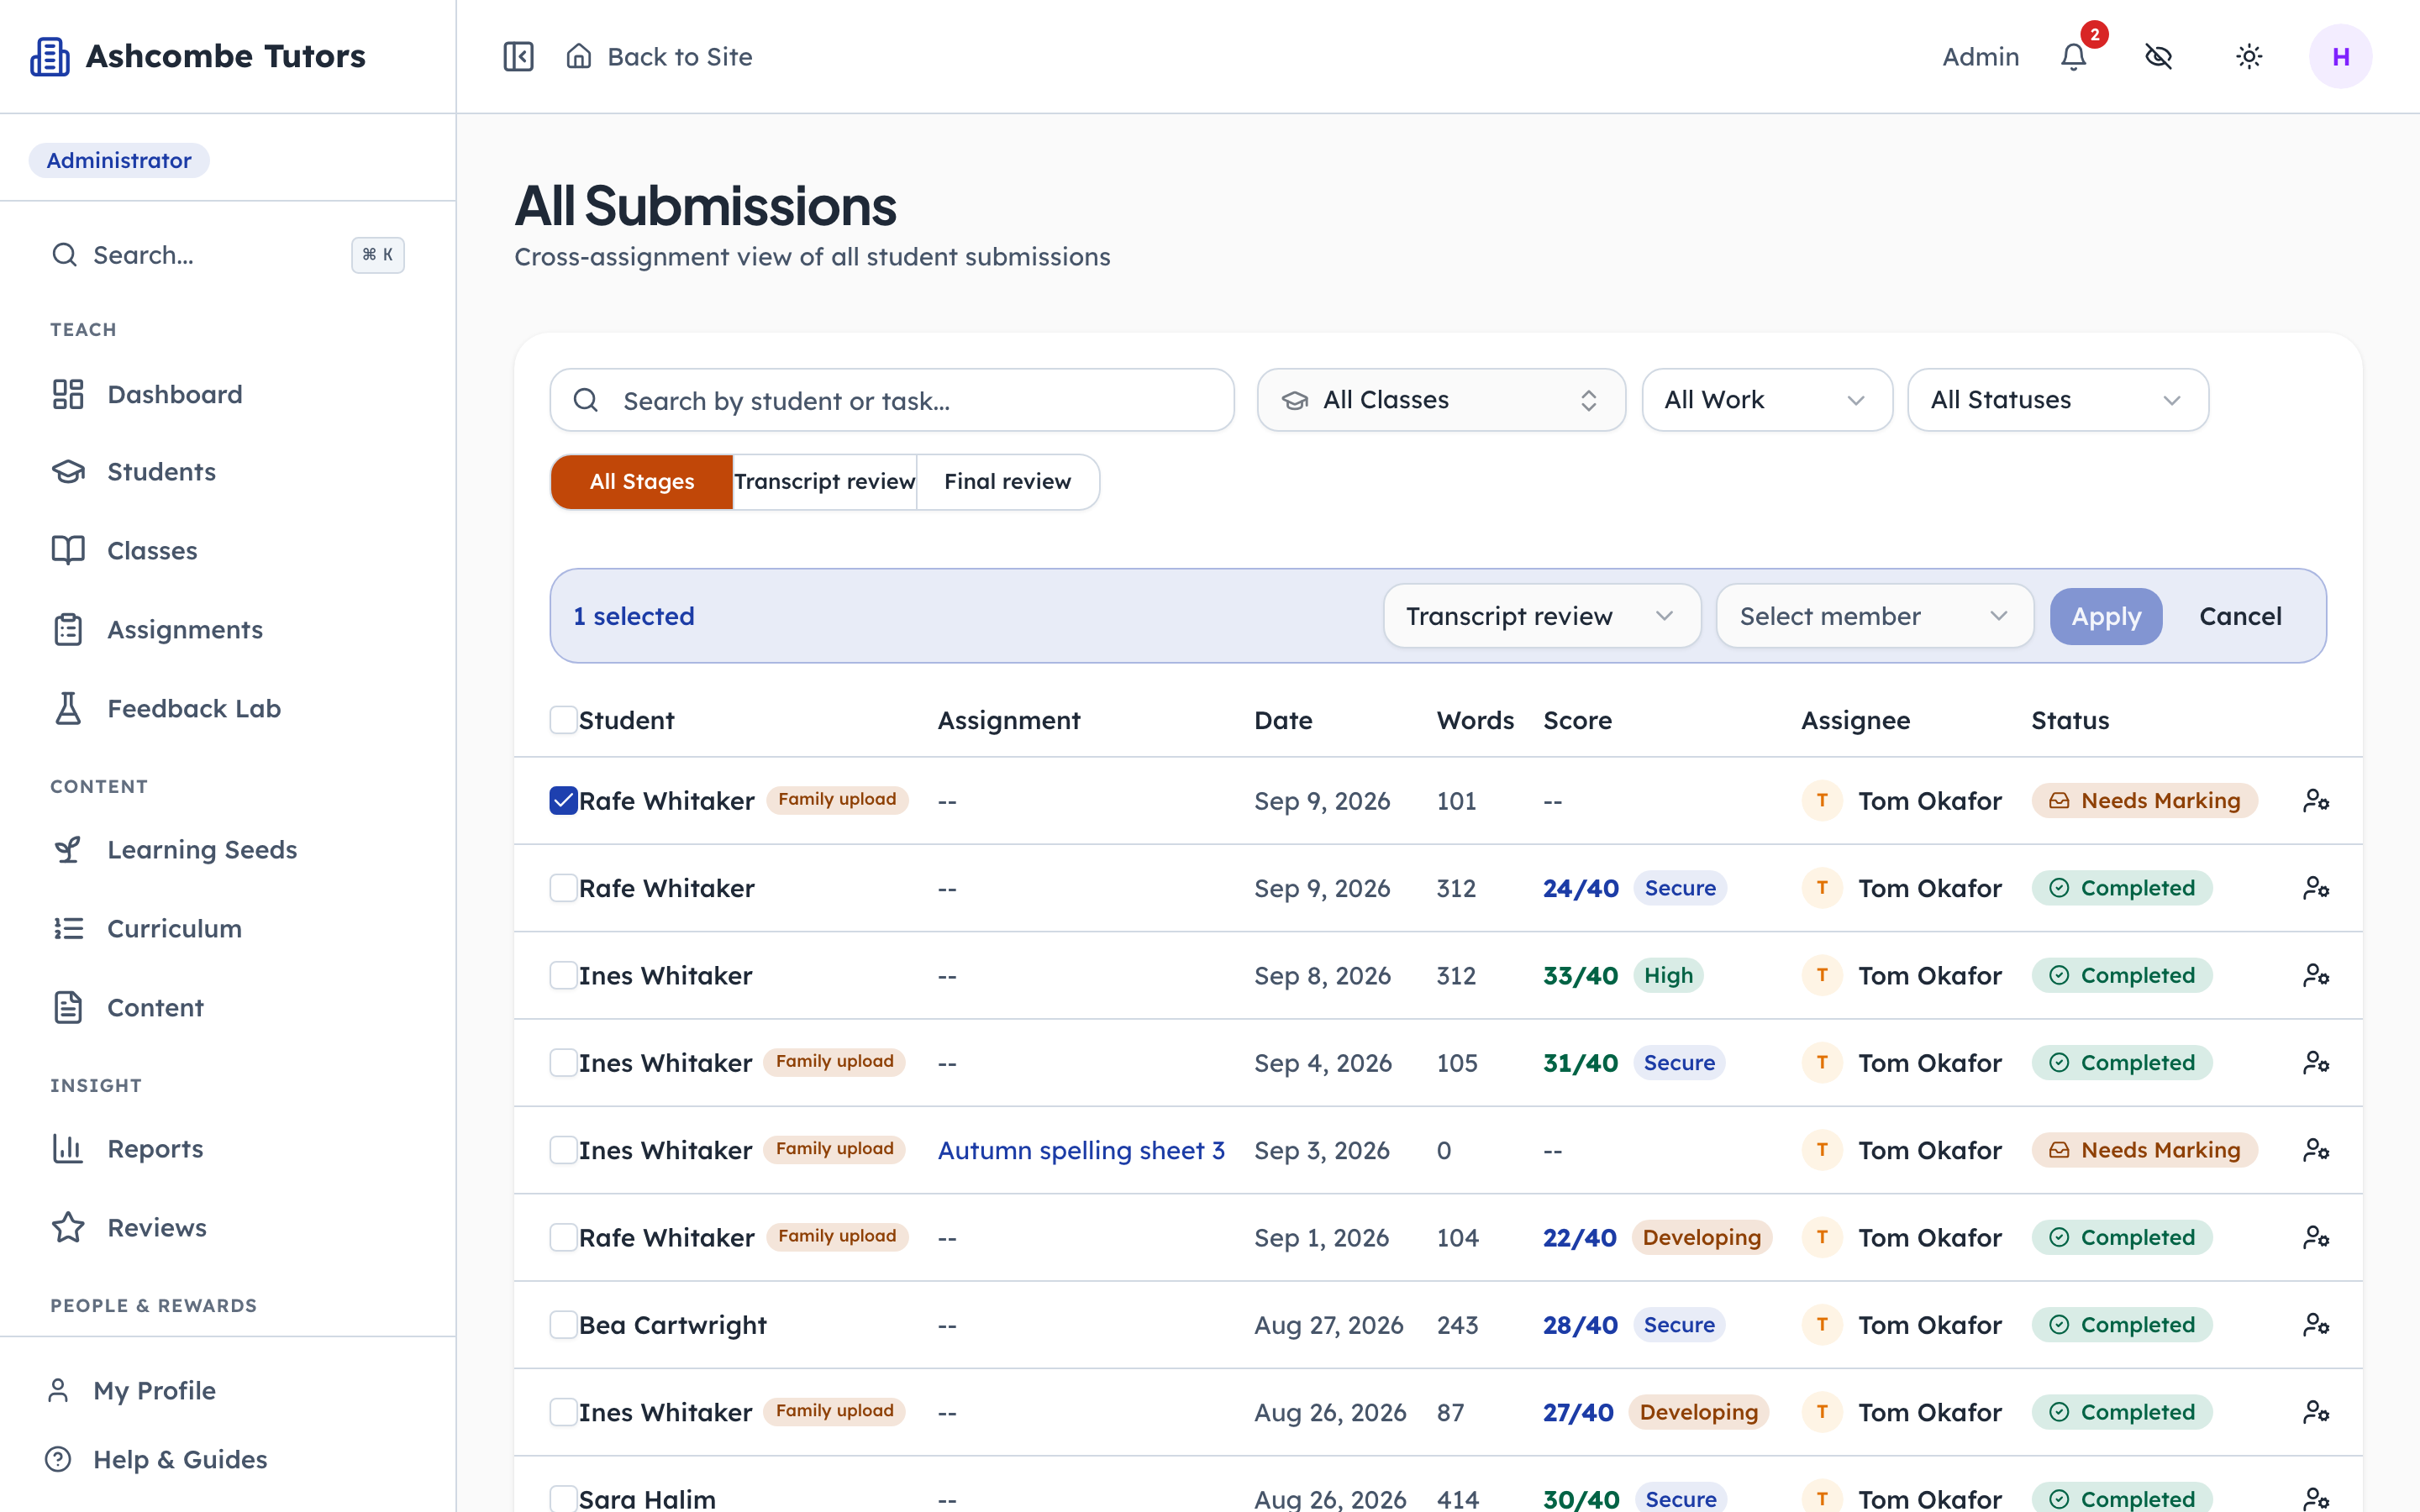
- 1Click: Tick the work
- 2Click: Who marks it
- 3Click: Hand it over
Tick the rows, choose the person, apply. The people offered are exactly those holding a marking-pool role, so the list is short and nobody is handed work they cannot do.
- penleap.com/dashboard/submissions/…Signed in as Org Admin
12Or reassign one piece from the work itself 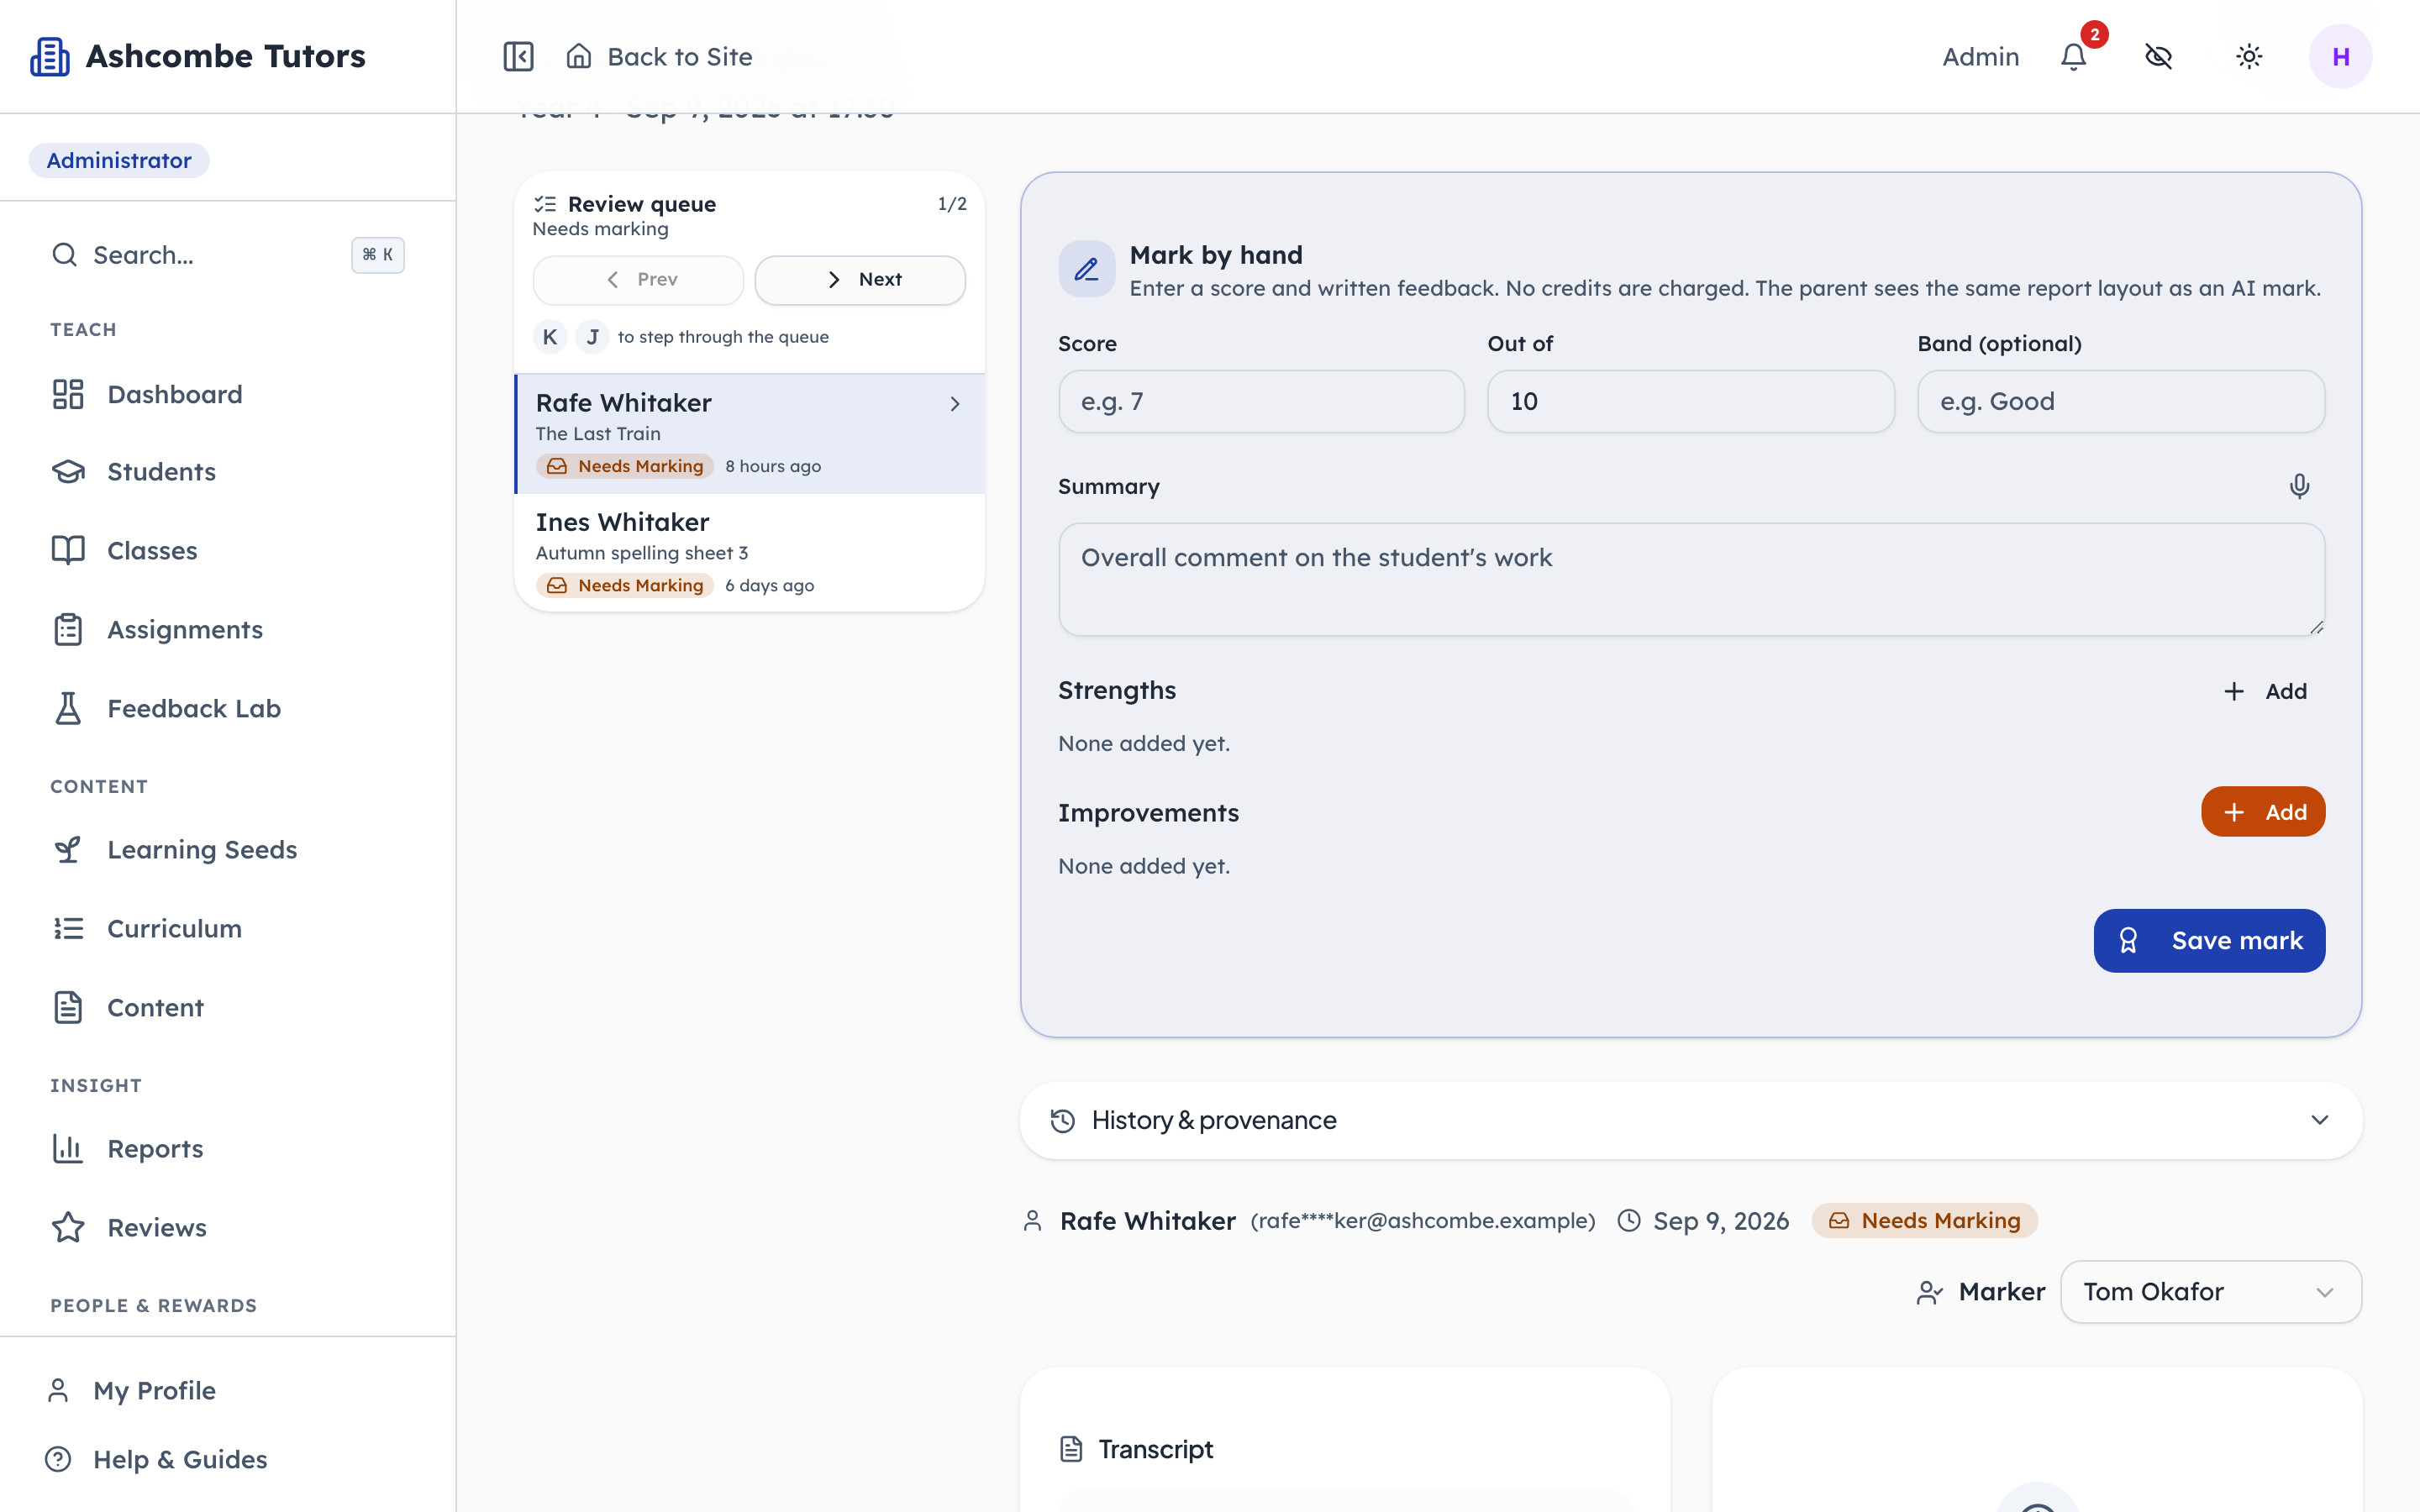
- 1Click: Change who marks this one
- 2Notice: Step through what is waiting
Open any submission and the marker is a dropdown at the bottom. The review queue on the left steps through everything waiting, so a marker never has to go back to the list between pieces.
When someone steps away
Step 13Org Admin- penleap.com/dashboard/teamSigned in as Org Admin
13Suspending keeps the record and closes the door 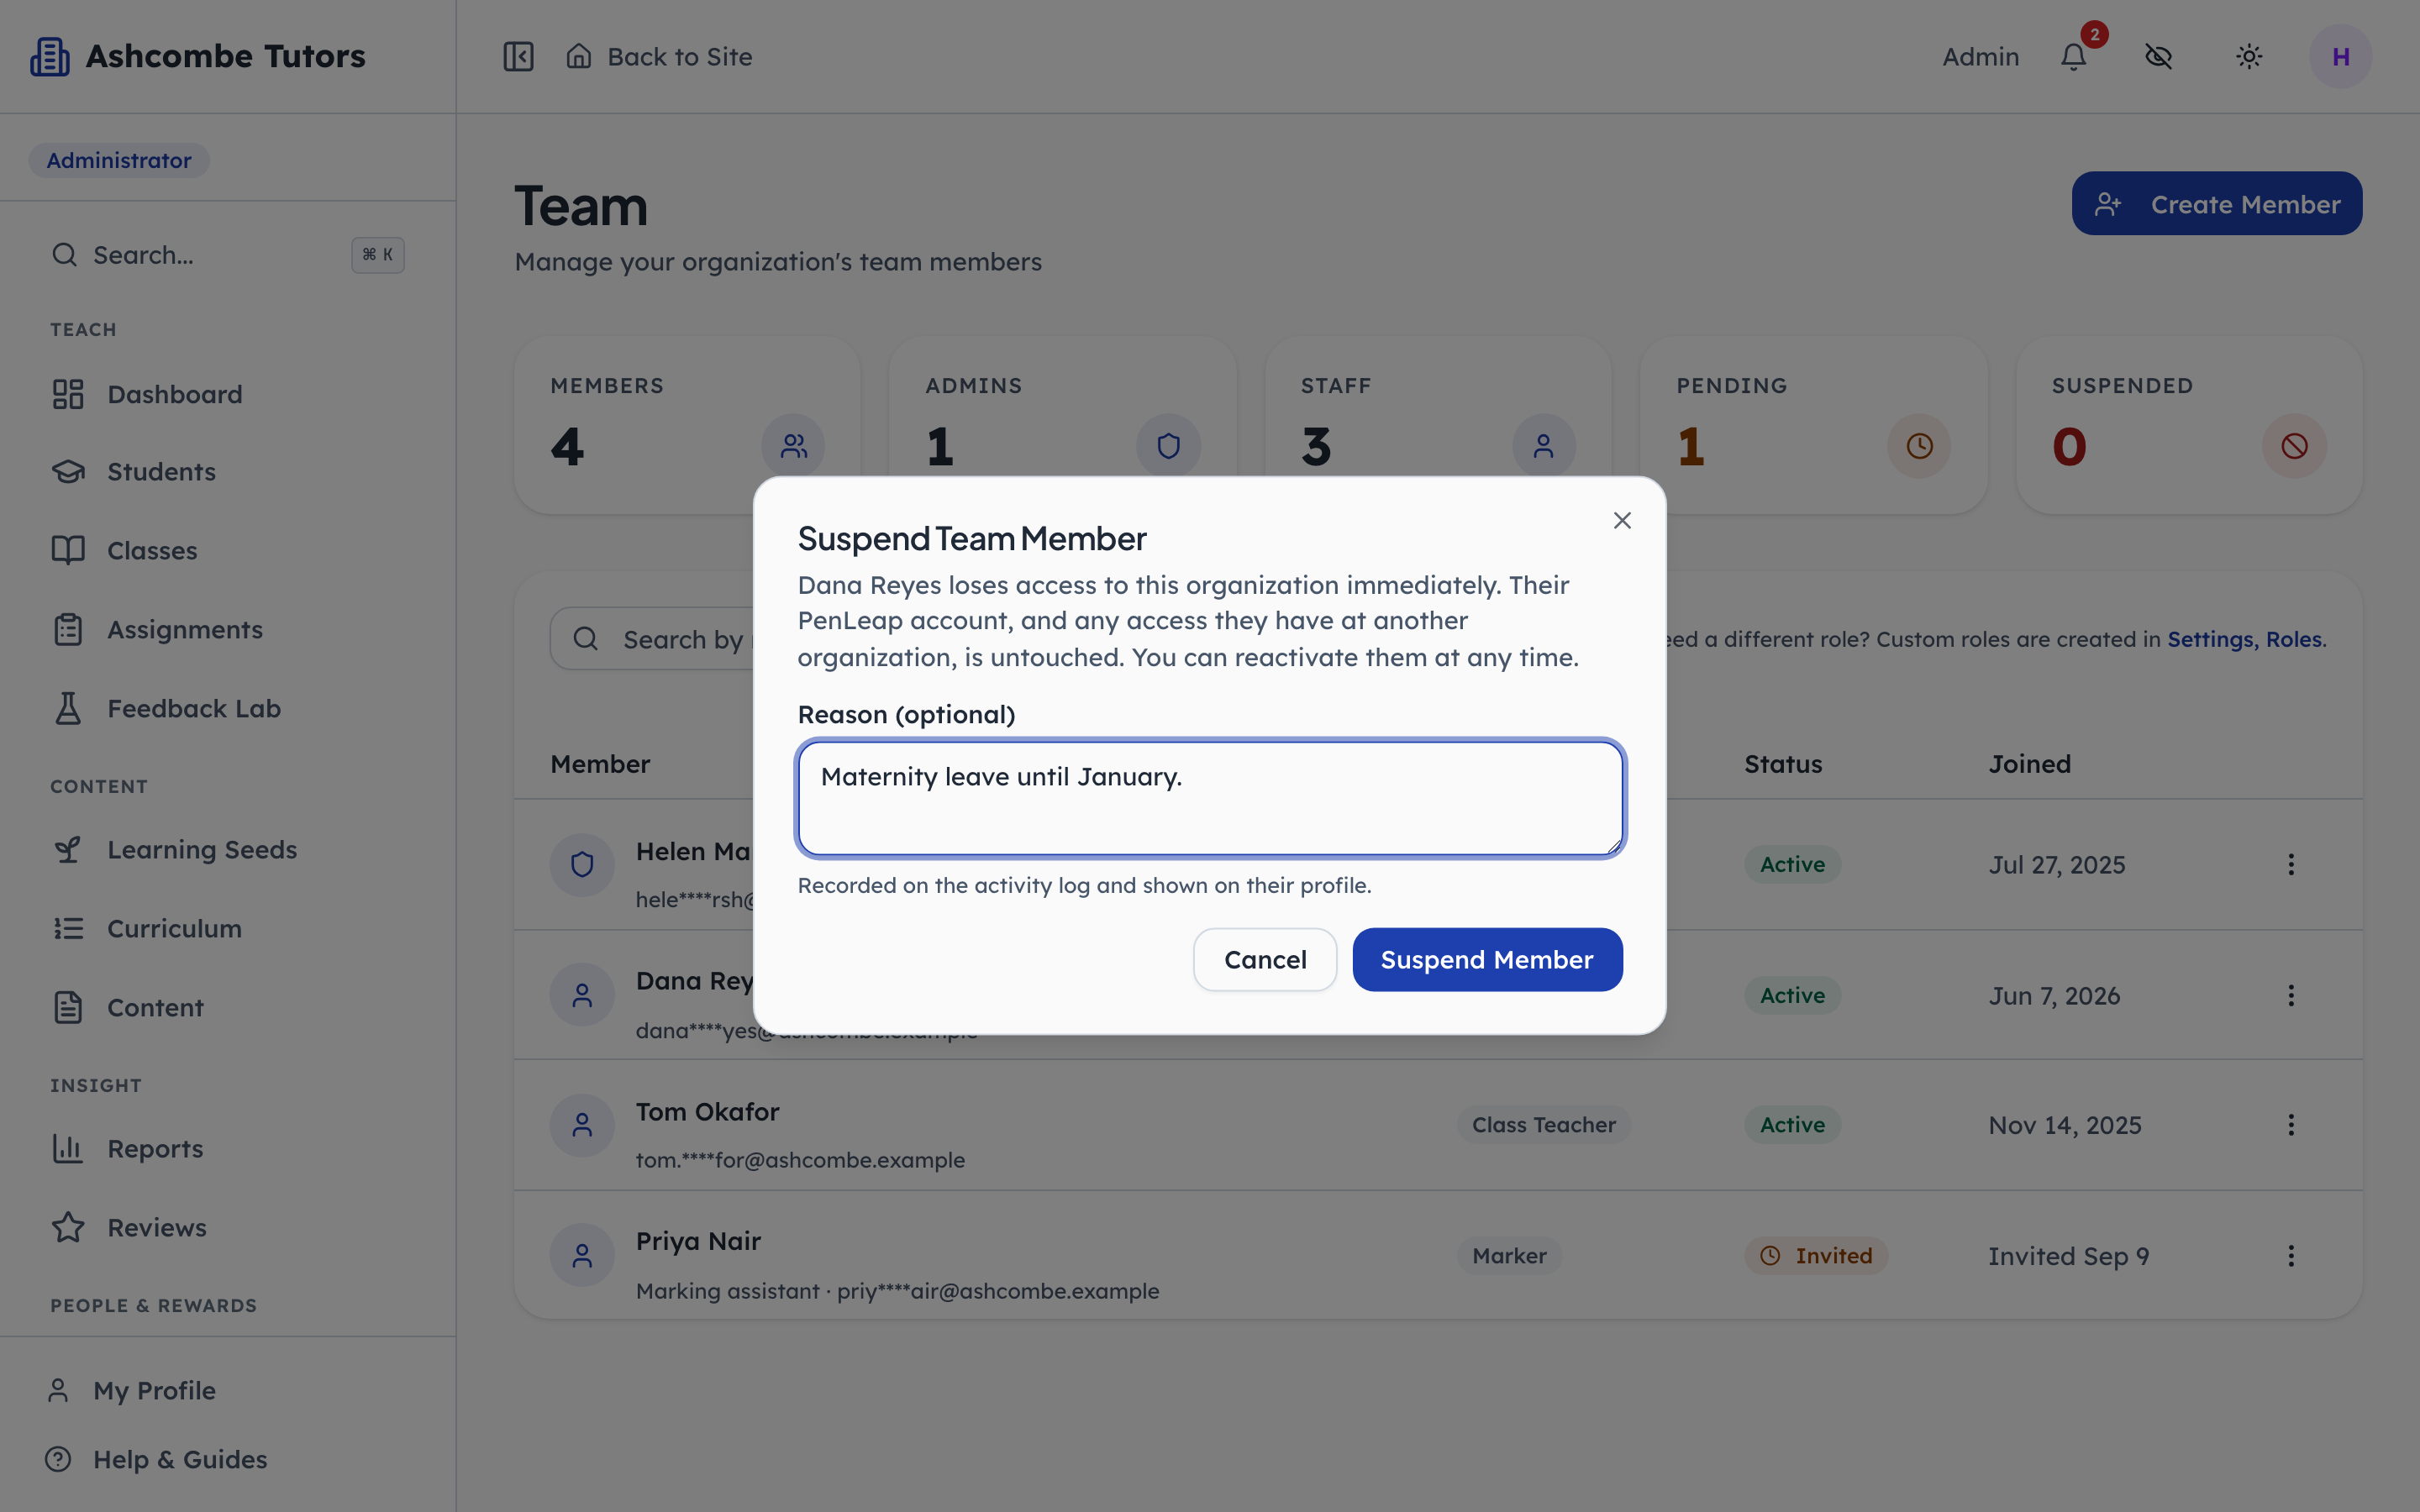
- 1Type in: For the record
- 2Click: Pause their access
A suspended member keeps their PenLeap account and any parent or student access they hold elsewhere. They simply stop being staff at this centre, and every screen here answers accordingly. Reactivating is one click. Removing is for when they are not coming back.